Friday, August 24, 2012

Study Buddy

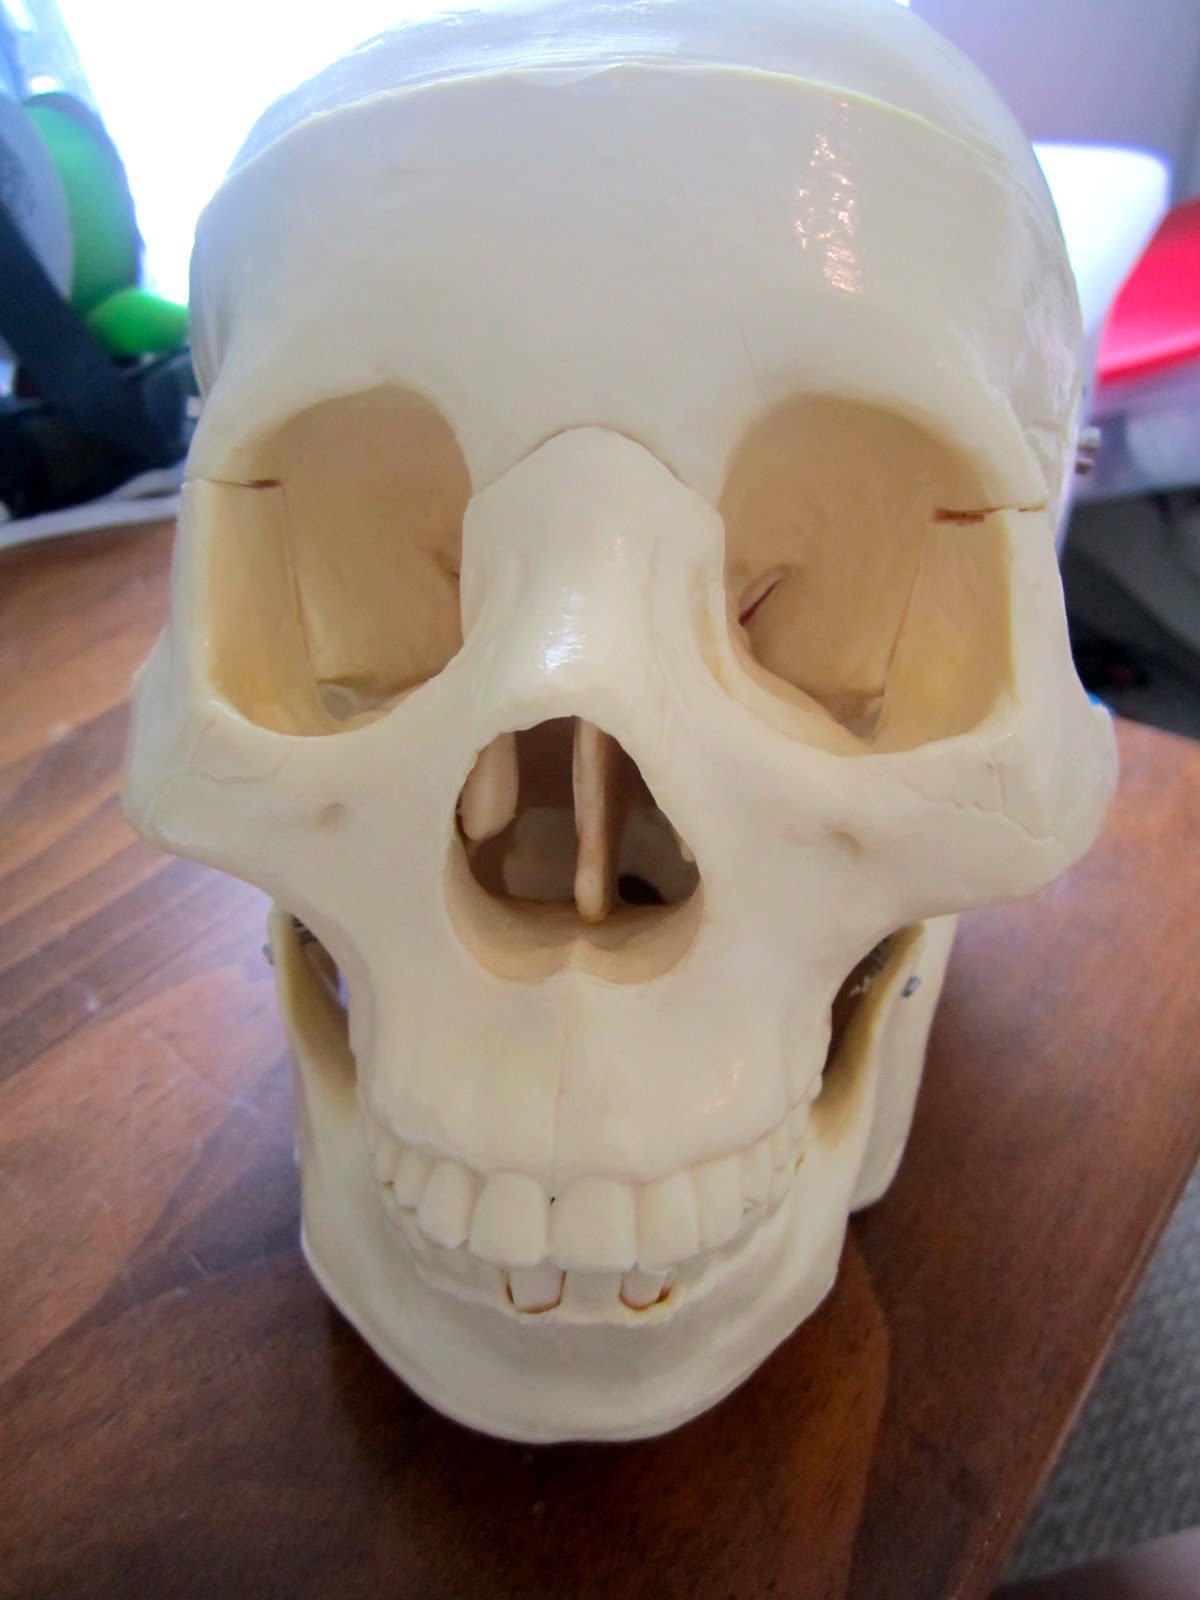
     I am insanely excited right now!  I got a new study buddy for Anatomy!  I'd like everyone to meet George Bedrock VonTrapp:

He has a pretty smile!
   They were selling him in the bookstore at school, and I had to have him!  I figured he would come in handy throughout school and even when I actually start a nursing job.  Maybe one day when I'm a Nurse Practitioner I can place him in my office. He's going to go far!  In the meantime we've been having a little fun. ;-)


    He's awesome, and he's my new best friend!

     In addition to my awesome friend George, I also have a recipe for Grilled Chicken and Tortellini with Roasted Red Pepper Cream to share with y'all.  I changed up a few things from the original, so if you want to check out the original, go right ahead.  Otherwise, here's what I did:


What you'll need:

1 Chicken Breast
1 (9oz) package tortellini (We used Spinach and Cheese)
2 cups frozen, chopped broccoli
1/3 cup drained roasted red bell peppers (from a jar or you can make your own)
4 TBS butter, halved
4 cloves garlic, minced
1/2 tsp red pepper flakes
1 TBS all purpose flour
1 cup heavy cream
1/4 cup grated Parmesan cheese
2 TBS diced roasted red bell peppers
1/4 cup bread crumbs
Salt and Pepper to taste

Season chicken with salt and pepper to taste, then cook in skillet over medium-high heat.  Remove and cut into chunks.  Cook tortellini and broccoli according to directions on tortellini package.  Drain; return tortellini and broccoli to saucepan.  Meanwhile, prepare an Alfredo sauce by melting 2 TBS butter over medium heat.  Add garlic and red pepper, sauteing for a minute or two.  Add flour, and cook only until golden.  Don't let it brown.  Add heavy cream, and cook, stirring until sauce is thickened.  Add Parmesan cheese, salt and pepper to taste.  Puree 1/3 cup red bell pepper in a blender.  Add Alfredo sauce; blend well.  Add Alfredo mixture, diced red bell pepper, and chicken to tortellini and broccoli in saucepan.  Cook and stir over medium heat 2-3 minutes or until heated through.  Pour into shallow ungreased 2 quart casserole dish.  In small bowl mix butter and bread crumbs.  Sprinkle over tortellini mixture.  Boil 1-2 minutes or until top is golden brown.


Enjoy!

Thursday, August 23, 2012

Ready for the Weekend

   My first week of school has been going swimmingly.  I am enjoying all of my courses immensely, and I'm actually looking forward to this semester.  However, I am thoroughly beat!  Being the nerd that I am, I have spent at least an additional 2 hours studying after each day, so between the studying, school itself, Monkey, the dogs, the C25K program, and keeping my house somewhat presentable, I'm ready for the weekend!  I love having all this stuff to do though, because it makes the weeks pass quickly.

   Even with all these new things going on, I'm still going to make time to fill y'all in on what's going on in this world of mine, starting with a few things I want to share today.  First off is the recipe for those Turkey Bacon Ranch Wraps I mentioned in my last post.


For one wrap you'll need:
1 Tortilla
2 slices Bacon
2 slices American Cheese
2-3 slices Turkey
Baby Spinach or Lettuce
Sliced Tomatoes
1 TBS Ranch

Place all your ingredients on top of a tortilla, and roll up!  So simple, and perfect for school lunches; especially if you're like me and can't stand sandwiches everyday.

   I also want to share a craft Monkey and I worked on today after school.  I got the idea from Pinterest, of course.

   It's a Senses Bear.  We used Construction paper, googly eyes for sight, popcorn kernels for touch, a piece of candy for taste, a cotton ball sprayed with perfume for smell, and ribbon for sound (it makes crinkly noises when rubbed together).  This was so simple, and yet such a good review for Monkey.  She really enjoyed this one.

   Guess what y'all!  Tomorrow's FRIDAY!!!  :-D

Sunday, August 19, 2012

Shut Up Brain, or I'll Stab You With a Q-Tip!

  Here is a sample of the type of conversation that goes on in my head:

Me: "I don't know what to wear tomorrow.  Or how to do my hair."

Brain:  "You're way over thinking this."

Me:  "But I don't want to have Mom hair."

Brain:  "WTH is 'mom hair'?"

Me:  "You know, messy thrown-up-into a ponytail hair.  But not the stylish kind.  Mainly because it contains baby spit-up."

Brain:  "But you don't have a baby, you have a 3-year-old."

Me:  "Okay so my mom hair will be filled with Play-dough."

Brain:  "Maybe we should focus on clothes.  What are your options?"

Me:  "I'm thinking khaki shorts and that orange blouse I love, but I wore that to get my ID the other day, so everyone saw me in it."

Brain:  "Everyone?  As in the 100s of other new students milling around, looking for their classes, getting their IDs, and otherwise not noticing you and what you're wearing?"

Me:  "Yes; them."

Brain:  *Sigh*  "You are making this way too difficult.  Wear that dress you made the other day."

Me:  "But what if I have to sit on the ground?"

Brain:  "Why would you have to sit on the ground?"

Me:  "Because I'll be in a dress, and it's Murphy's Law."

Brain:  "I don't think that's Murphy's Law."

Me:  "It is; Murphy's Law states that any woman wearing a dress will have to sit Indian-style on the ground.  Or she'll have to wrestle two dogs in a crowded parking lot....or something like that."

Brain:  "You really need to let that go."

Me: "You're the one who keeps reminding me."

Brain:  "Well played."

   Although the jury is still out on my attire and hairstyle for tomorrow, I did pack myself a yummy lunch.  I found a recipe for Baked Apple Chips, and I made two batches today so that I'll have something to munch on during the week.

These things make your house smell like Fall.
Here's what you need:
1 Granny Smith Apple
1 TBS cinnamon
2 TBS brown sugar

Slice the apple ultra thing.  (The original poster went on and on about using a mandolin.  I don't have one, so I just sliced them the old fashion way.)  Mix the cinnamon and brown sugar in a small bowl.  Dip your apple slices in the mix, shaking off excess.  Lay slices flat on a parchment paper- lined baking sheet.  Bake at 225 for an hour.  Take out and flip.  Bake for another hour.  Let cool and store in airtight containers :-)

Easy Peasy!

  I also made a Turkey Bacon Ranch Wrap that I'm entirely too excited about, so I'll let y'all know if that's any good :-)

  Monkey and I went to the park so that I could get away from my brain for a while, who was being obnoxiously snotty to me about all my anxieties about tomorrow.  I swear my brain must be part male.  Ugh!  While at the park I found the funniest thing, and I have to share.

Hmmm....
   Do you see it yet?


   Now?


   Yeah, I didn't either, until my child and I got into an argument about how there were 6 nails and 9 saws...only....there aren't.  Score one for Monkey.

   Well I'm hitting the hay early tonight, and of course, by that I mean Brain and I are going to have a nice long chat before he/she lets me pass out for an hour or two and then wakes me up to wonder if I've packed a lunch yet.

Friday, August 17, 2012

Happy Anniversary, Baby!

   Four years ago today I married the man I loved.  Although my love for him then was as fierce as I could manage, it's a mere shadow of what I feel for him today.  After four years of marriage, not only is he the man I love above all others; he's the man I share a life with, a home with, a child with, and a story with.  He's the first one I want to call when I have some funny story to tell.  He's the first one I run to when there's a crisis.  He's the one that can make me smile, make me laugh, and bring me to tears with just a look.  Even when he's far away, he's still the voice in my head encouraging me to be a better me, to go after that goal, and to believe in myself.  I am so grateful for these past four years, and I can't wait to see what the next 50-60 hold.

    In addition to our anniversary today, Monday is J's birthday, so I wanted to make sure I sent off a care package with enough goodies to spoil him for both occasions.  That's why I was so excited when I found Cake in a Jar!


All you need is 4 Pint-sized jars and the cake mix of your choice.  Prepare your cake batter.  Spray the inside of your jars with cooking spray.  Then fill the jars up about 3/4 of the way with the batter.  Place them on a cookie sheet and bake for the time required in your recipe, or until a toothpick inserted into the middle of the cake comes away clean.  (You may have to adjust the time slightly.)  When it's cooked, remove from oven and carefully screw the tops on tightly.  You'll hear them pop as they seal.  Voila!  Cake in a Jar lasts up to 6 months!  I sent 4 jars of red velvet cake to my hubby with a can of store-bought cream cheese icing.  He can either share or hoard them for later :-)

   In his care package I also included a little photo collage Monkey put together:


And I packed a bag of my Homemade Granola in there along with a few essentials such as razors, vitamins, etc.  I haven't heard whether or not he's received it, but considering I sent it at the end of July, here's hoping.

Wednesday, August 15, 2012

And the Mama Bear said, "Who's been sleeping in my bed?"

     Today was Monkey's first day back at the Child Development Center here on base.  When she walked in, she made a beeline for her favorite teacher, who greeted her with a warm hug.  It definitely made it easy for me to leave her there after seeing how happy they were to have her back.  I took full advantage of my "me-time" to wash the dishes, mop the floors and get some errands taken care of.  The main thing I wanted to accomplish was a bit of grocery-shopping.  It was very nice to be able to go in, get what I needed and get out without anyone moving the car while I was inside or adding an extra $100 to my bill.

     Although her daddy isn't around to give me fits, there are still ample ways for me to be stressed.  Take the other night for example.  Monkey has a new fascination with my bed.  She loves to climb into it and play with her toys on my headboard.  She nestles down into the covers to hide, usually when I ask her to clean her room.  She even shoves all the covers onto the floor so she can use them as her own personal tent.  The other night I went into my room after Monkey had fallen asleep and found my blankets on the floor once more.  I shrugged, heaved them back on my bed, and nestled down for the night.  I Facebooked for a while, read a book and played on my phone for a good hour before deciding that 1:00 am was a good time for sleep, so I put away my things, fluffed my pillow, and turned over to get comfortable.  Right as I was reaching for the light I saw it.  Something slithers right next to my chest.  I leapt out of bed with a shriek!  I hate snakes, and I was petrified at the thought of one slinking its way into my bed.  I started flinging my comforter up and down and side to side, screaming, "Kill it 'Douille!  Get 'em Roux!"  My dogs, alerted by my antics, began hunting for the slippery creature, barking and growling like the protective angels I knew they were capable of being.  A few minutes go by before I stop long enough to notice the dead newt on my floor.  Apparently my "snake" was about two inches long and had feet.  I must have scared him to death quite literally, so I think I got the better end of this deal.  This is why I need Lasik surgery!  And a newt-free home.  And a slightly lesser fear of snakes.  And a better bedtime.  And...ugh!

    Now that I've given myself the heebie-jeebies again, I have a recipe that I find rather appropriate to share.

Drumroll, please....

Rattlesnake Bites
(No; I'm not kidding.)

1 lb ground beef (or ground turkey)
4 oz chopped jalapenos
8 oz cream cheese, cubed
1/4 teaspoon ground cumin
1/4 teaspoon chili powder
3-8oz tubes crescent rolls

In a large skillet, cook beef/turkey and jalapenos over medium heat.  Drain off grease.  Add cream cheese, cumin, and chili powder.  Cool slightly.  Separate  the crescent rolls into triangles (There should be 24).  Place about 1 TBS of the beef/turkey mixture on the short end of the triangle, and carefully roll up.  Place seam-side down 2 inches apart on ungreased baking sheets. (I like to line mine with parchment paper for easy clean up.) Bake at 375 for 11-14 minutes or until golden brown.

I hope you enjoy them, and I equally hope you find your beds empty of any critters tonight :-)


Sunday, August 12, 2012

Feelin' Good


     I've been going back and forth on wether or not I'd post these, but I think it's time to share.  I know I mentioned a while back that I was beginning the couch to 5K program and the 30 Day Shred.  I finished the Shred a little over a week ago, and I wanted to share my results.  I didn't really change the way I ate.  I did, however, give up my only vice: sweet tea.  Instead I now drink water all day, except for the occasional coffee.  I was amazed at the results I got after adding 1 hour's worth of exercise to my routine three days a week and 30 minutes a day on the days I wasn't running.  So here we go:

Sorry for the dirty bathroom mirror.
     I'm embarrassed to say that this was me in the middle of June, modeling a bikini a friend of mine convinced me to buy because as she said, "There's always someone at the beach who looks worse."  Not exactly the motivation you want to hear, but it did motivate me in a way.  If my only consolation is looking for someone who is bigger than me, that's a problem, right?  Right!  I bought the bikini in May, and it stayed hidden in my closet until I pulled it out that night.  My husband and I had started Insanity (which I never finished), but something else was started that night too.  My determination to be better, to be healthier.  I wanted to be fit for the first time in my life.

Sorry for the blur.
     This is me from last weekend.  As you can see, I've still got some work to do, but the difference between who I was then and who I am now can't be captured with a picture.  I feel so much better.  I no longer avoid going upstairs, in fact, some days I run up and down them just to wake myself up.  I love running, even though I still get butterflies before setting out every other night.  All-in-all I'm happier, and I am finally proud of my body.  I'm not finished, but I can see how far I've come, and I'm not stopping here!

June 19, 2012
August 4, 2012
     Although Jillian Michaels got on my nerves long before the 30 Day Shred program was over, I can definitely give her props.  It worked for me.  No; I'm not "shredded", but well, you can see the benefits for yourself.  That video took a total of 30 minutes, and Monkey loved doing them with me, so it was easy to fit into our schedule.  

   Like I said, I'm not stopping here.  I'm on Week 4 of the Couch to 5K program, and I'm loving it.  The program is designed to help break you in gradually, and that's made all the difference for me.  Running is a head game for me (I blame the horrible Middle School coaches I had lol). This gradual process eliminates that.  The first night, I kept telling myself, "Keep going, you'll be able to walk in just a few more seconds."  Now I can tell myself, "You ran for 3 minutes straight and weren't sore, so you can handle 5 minutes."  It may not sound like much, but by the end of it I'm hoping to be able to say, "You've run one 5K already; you've got this!"

   I've also started the 7 Day Arm Challenge, so I'll let y'all know how that goes.  Now enough of this, I want to show off one more thing before I go.  I made a dress!  For me this time!!!

   I'm so excited!  I went to Wal-Mart yesterday and bought myself a men's 3XL shirt for $5 so I could try this tutorial out.  It was so much fun, and I love the dress I turned it into.  I wear a size L in dresses, so I used a 3XL Men's shirt.  I could've used a 2XL, but they were too short for my taste.  Once I got it home, I tried it on inside out and, following the tutorial,  marked where my shoulders started with some chalk.

Feelin' like I'm back in high school, wearing a borrowed t-shirt from my football-playin' boyfriend. Lol
    Then I drew a line from that mark to where the original armpit was and cut.  Then I put the sleeve back on my arm to measure where my armpit actually was, leaving a couple of inches for breathing room.

   
     I marked this with chalk and sewed.  Before I cut off the excess, I put the sleeve back on to make sure it wasn't too tight.  When I was sure it fit I cut the excess fabric.  Then I simply sewed the sleeve back on to the shirt/dress.

Now it fits better up top.
But the bottom's still big.
   Now I marked from the new armpit all the way down to the bottom of the dress, and sewed and cut away the extra fabric.  Then I measured the elastic to be about an inch shorter than my sleeve, cut two pieces of it, and sewed a piece to the top of each sleeve (while the sleeve was inside-out of course).  

Ta-Da
  This is where I strayed from the tutorial a bit.  You can sew a piece of elastic all the way around the dress where your waist is, but I found a belt that used to belong with the shirt I repurposed for Monkey, and I used that to cinch my waist instead.  I did go back and put some elastic on the front half of the dress, but that was just so that the belt wouldn't bunch up the dress in a weird way.  Here's the final result:


   Sorry for all the cheesy Facebook-style mirror pictures, but I haven't trained Monkey to use a camera yet. Haha.  I can see it in her future, though.  My camera went missing, and I found it in her toy box a few days later.  O.o

  Well that's all I have for y'all today.  I hope you're enjoying your Sunday!

Friday, August 10, 2012

Recipes for a Good Morning

     Happy Friday everyone!  Today I want to share with you two breakfast items that are extremely yummy!  The first is a DIY Mocha Frappuccino that'll save you plenty of $$$ if you're like me and addicted to those little 4-packs of Fraps you can get at most grocery stores.  These are yummy, but very sweet, so feel free to play around with the sugar amounts if you have less of a sweet tooth.

Hmmm....morning bliss :-)
Here's what you'll need:
1/2 cup brown sugar
1/2 cup white sugar
1/2 cup condensed milk
10 cups brewed coffee (I use Community Dark Roast, but you can use your favorite blend)

Brew coffee to your liking.  This can be as strong as you want, so just do your thing ;-) While the coffee is brewing, pour sugars and condensed milk into a 2-quart pitcher.  Pour freshly brewed coffee over it, and stir well.  Let sit in the fridge over night, and enjoy the next morning.


  I could not have made this at a better time.  I couldn't sleep last night, so I was awake until 2 am playing Words with Friends with a relentless partner who would not admit defeat.  Then I was awoken at about 7 am by a restless pup who had eaten his entire bed (again) and wanted out of his kennel.  Then I came downstairs and saw this in the fridge, and the world was sunny and bright once more :-)

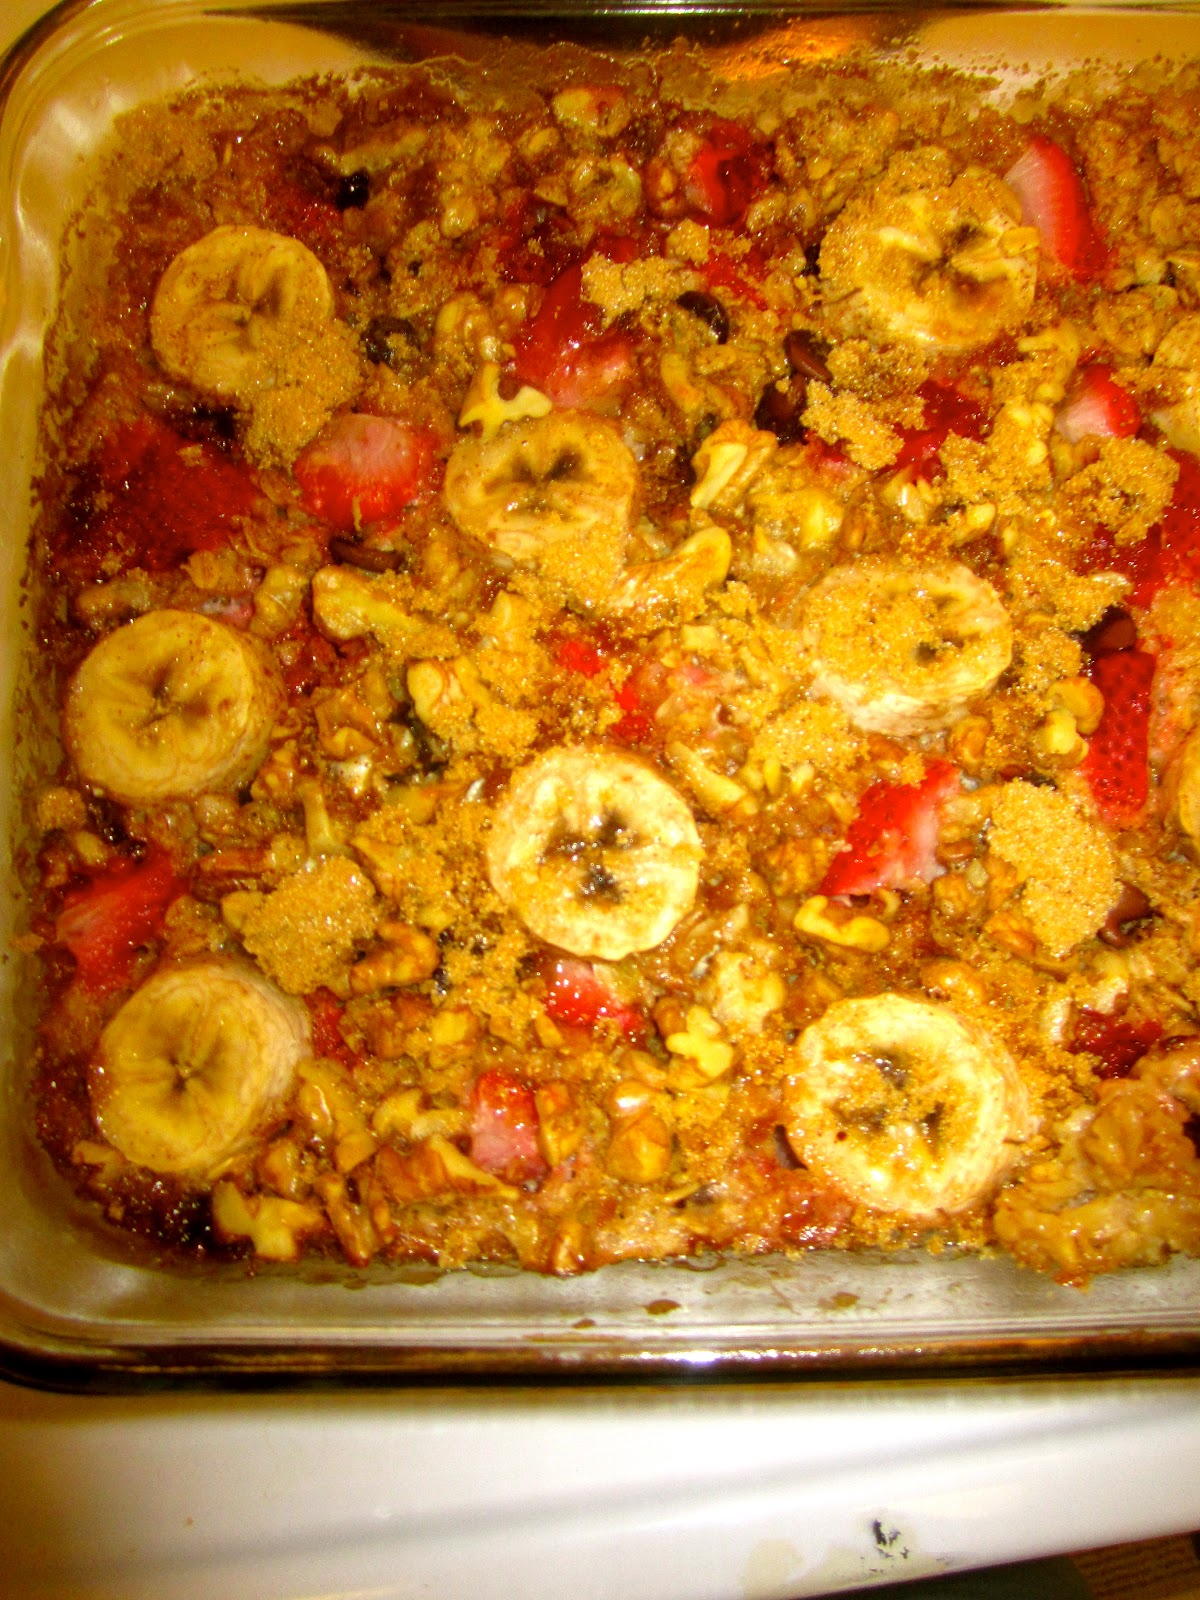
Then next recipe I want to share is much better for you, and tastes just as good :-)  This is another Pinterest find: Baked Oatmeal.


This is the perfect recipe for a Sunday brunch or if you have a large family.  It was so good; I can't wait to make it again.

So here's what you'll need:


  • 2 cups old fashioned rolled oats
  • 1/3 cup light brown sugar
  • 1 teaspoon baking powder
  • 1 tablespoon grated orange zest
  • 1 teaspoon Chinese five spice
  • 1/2 teaspoon salt
  • 1/2 cup walnut pieces, chopped
  • 1 cup sliced strawberries
  • 1/3 cup semi-sweet chocolate chips
  • 2 cups milk
  • 1 large egg
  • 3 tablespoons butter, melted
  • 2 teaspoons vanilla extract
  • 1 ripe banana, peeled, 1/2-inch slices

Preheat oven to 375°F and generously spray the inside of a 10-1/2 by 7 inch baking dish with cooking spray and place on a baking sheet.

  1. In a large bowl, mix together the oats, sugar, baking powder, orange zest, Chinese five spice, salt, half the walnuts, half the strawberries and half the chocolate. (Save the other half of strawberries, walnuts and chocolate for the top of the oatmeal). In another large bowl, whisk together the milk, egg, butter and vanilla extract.
  2. Add the oat mixture to prepared baking dish. Arrange the remaining strawberries, walnuts and chocolate on top. Add the banana slices to the top then pour the milk mixture over everything. Gently shimmy/shake the baking dish to help the milk mixture go throughout the oats.