Showing posts with label Cake. Show all posts

Wednesday, August 20, 2014

And for Dessert: Diabetes!

     It's no secret that my husband drives me insane.  I mean, I've given y'all several examples on this blog alone of how much he makes me question the reason I agreed to let him annoy me for the rest of my life.  But I think it's also fair to say that I would do anything for that crazy, slightly annoying husband of mine.  And apparently that's a fact he's not only discovered but has decided to exploit.  For example, today is his birthday.  A few weeks ago while I was writing up my grocery list, I asked him and Monkey to flip through my "Taste of Home: Fun Food" magazine to come up with ideas for her school lunches.  While flipping through the pages, she and J came across a rather elaborate picture of a cake decorated to look like the classic game, CandyLand.  J excitedly pointed the picture out to me and requested that I make it for him for his birthday.  I laughed, thinking he was joking, and said something witty that amounted to "no".  But then something happened.  He kept bringing up the cool CandyLand cake, and mentioning how much he liked it, and he'd throw in the fact that his birthday was coming up after all.  So what did I do?


     I made the darn cake for him!  I'll get to how to make your own in a minute, but in the mean time let me tell you what my sweet, but oh-so-chokable husband tells me as I'm buying the last bit of candy to make his dearest birthday wish complete.

Me:  "Hey baby, do you see any rock candy?"
J:  "No; you don't need that"
Me: "It's for your cake.  I wanted to include the Ice Palace, so I was going to use blue rock candy"
J:  "I don't know why you're even doing this"
Me:  "What do you mean?  This is the cake you've been asking for."
J:  "Yeah, I was just messing with you.  Then you ran with it, so I figured I'd let you."
Me: .......................................You can't strangle him in Walmart.  You can't strangle him in Walmart.  You can't strangle him in Walmart!

    Well, regardless of how he finagled me into making the cake, it's made now, so I might as well share a quick how-to with y'all.  Here's what you'll need:

Cake mix (can be any flavor; I used a recipe from Better Homes and Gardens for a White cake)
White icing
Green food coloring
Starbursts
Peppermints
Mini marshmallows
Rock candy (or Jolly Ranchers, crushed)
Lollipops
Chocolate cupcake, iced
2 mini snickers
4 ice cream cones (cut the tops off of 2 of them)
Blue cookie icing
Purple cookie icing
Black cookie icing
Multicolored sprinkles
Chocolate sprinkles
Cinnamon sprinkles
Sour Patch Kids (I used 4, one in each color as the "players")

    Bake your cake mix according to directions on back of the box for a 9x13 cake.  Let cool completely before icing.  Mix white icing and green food coloring in a medium sized bowl, use this to ice the cake.  Top cake with Starbursts, making sure to keep a pattern so no two colors are next to each other.  For "Mr. Mint"'s corner, arrange peppermints (or peppermint candy canes, if they're in season) in a cute pattern, and sprinkle cinnamon sprinkles around them.  Add an area for "Princess Lolly" by using a few crushed Jolly Ranchers to mark the spot.  Next add the lollipops or various sizes (I used 2 Dumdums, and 1 Blow Pop).  Next I added the chocolate cupcake (complete with chocolate fudge frosting and chocolate sprinkles) for "Chocolate Mountain".  I set a pair of mini Snickers next to the cupcake, one on each side, and sprinkled a few extra chocolate sprinkles around the base of the "Mountain".  Next I added a mini-marshmallow "bridge" between two of the rows of Starbursts.  Finally I erected the "CandyLand Castle" by inverting the 2 whole ice cream cones side-by-side, and then I placed one of the halved ones in front and one in the back, upside-down.  Next I added the windows and doors by using purple cookie icing.  Then I topped the castle off with blue cookie icing roofs.  I spread a rainbow of various-colored crushed Jolly Ranchers around the base of the "castle". Next I piped out the "Happy Birthday" on the Starbursts using black cookie icing.  Finally I sprinkled the entire cake with multi-colored sprinkles for good measure.

    There were two big bonuses for this cake: 1)  There really isn't a "right way" to decorate it.  If you look at the way CandyLand has changed over the years, you can really throw any type of candy on a cake and call it good.  2) Monkey was able to help, and we both enjoyed that. :-)

   
     To top it all off, J really enjoyed his Diabetes-inducing CandyLand Cake.  And I discovered that my husband turns into a Disney Princess when he makes his birthday wish before blowing out the candles.


     Anyone else see it?  Anyone?  No?  It's just me?  Fine!  Keep wishing, Babe.  Maybe one day your prince will come (but he probably won't make you awesome cakes).

Wednesday, May 29, 2013

From Toddler to Teenager

     I have finally come to terms with the fact that my baby girl is no longer a baby, but I didn't think she would skip straight from toddler to teenager.  That little Monkey has the wit and attitude to try a saint.  Last night for example, my little brother and I were watching a movie after Monkey had gone to bed, or that's where she was supposed to be at any rate.  Then I saw a little head poke out behind the staircase.  I told her to get back in her bed.  She giggled and obeyed.  Then she came back downstairs.  I told her to go to bed again.  She bargained and argued, and I finally told her if she came off those stairs again she'd be in trouble.  She listened.  Sort of.  After our movie was over we were headed upstairs to bed only to find Monkey camped out on the stairs with her blanket and pillow, fast asleep.  She listened to her mommy and didn't come off the stairs again, but that's not exactly what I had in mind.

     In addition to being pretty good at finding the loophole in just about anything, she's also got a pretty sharp tongue in her head.  The other day we were coming through the gate on base, and we stopped at the ID checkpoint.  When the guard stuck his head in the car to check the backseat, Monkey hollers, "Hey old man would you quit looking at me?"  Thank goodness he was old and hard of hearing.  That child is going to get me in trouble one of these days.

     Besides keeping the inevitable grey hairs at bay, I've also been enjoying my down time.  It will be ending all too soon, as school starts up again next week.  In the meantime, though, I did manage to squeeze in a visit to my hometown to see family.  I had a great trip, and it was long overdue.  I missed my kitchen, though.  Since we came home Sunday I've been cooking like crazy, and I have an excuse because my little brother is staying with us.  And of course, I have to share :-)

    First up is a new favorite pasta from Quick From Scratch Pasta Cookbook, which is quickly becoming my go-to for recipes.

Ziti with Honey Mustard Salmon
You'll need:
1 lb salmon fillet
1 TBS honey
1/2 tsp black pepper
1 TBS cooking oil
1 onion, chopped
1/3 cup dry white wine
1 tsp grainy or Dijon mustard
3/4 cup heavy cream
1 1/4 tsp salt
2 TBS fresh parsley, chopped
3/4 lb ziti

     Heat oven to 400 degrees.  Lightly oil a small roasting pan.  Put salmon in the pan, skin side down.  Spread honey over the salmon, and then sprinkle 1/4 tsp pepper over the salmon.  Roast until just barely done, about 12 minutes, depending on the thickness of the fillet.  Remove from oven.
     In a medium saucepan, heat the oil over moderately low heat.  Add the onion and cook, stirring occasionally, until translucent, about 5 minutes.  Add the wine and simmer until about 1 TBS remains, about 2 minutes.  Whisk in the mustard, cream, salt, and the remaining 1/4 tsp pepper.  Turn off heat.  Flake the salmon and stir it and the parsley into the sauce.
     Meanwhile, in a large pot of boiling, salted water, cook the ziti until just done, about 13 minutes.  Drain the pasta and toss with the sauce.

Enjoy!

  Since I've been a slacker and have only blogged twice this month I'll share a few more things.  We've been hunting blackberries just about every night for the past couple of weeks.  They're everywhere on base!
      These are perfect for Monkey's afternoon snack and J's morning yogurt, plus I can freeze what we don't eat for later.  Not to mention they're free!  And I can use them as substitutes in a few baking recipes like this one:

Blackberry Yogurt Cake
 You'll need:
1 cup butter, softened
2 cups sugar
3 eggs
3 TBS lemon juice, divided
Zest of one lemon
2 1/2 cups all-purpose flour
1/2 tsp baking soda
1/2 tsp salt
8 oz Greek yogurt, plain
1 1/2 cups fresh or frozen blackberries
1 cup powdered sugar

     Preheat oven to 375.  Grease and flour a 10" Bundt pan, set aside.  Sift together 2 1/4 cups flour, baking soda and salt.  Mix in lemon zest, set aside.  Cream butter and sugar until light and fluffy.  Beat in eggs, one at a time.  Stir in 1 TBS lemon juice.  Alternate beating in the flour mixture and yogurt, mixing until just incorporated.  Toss the blackberries with remaining flour.  Mix them into the batter gently.  Pour batter into Bundt pan, and place in the oven.  Reduce temperature to 325.  Bake for 1 hour or until a toothpick inserted into the cake comes out clean.  Allow to cool 20 minutes in the pan.  Then turn out onto wire rack and cool completely.  Once cooled whisk together remaining lemon juice and powdered sugar and drizzle over the top.

    This is a recipe I've adapted from A Spicy Perspective, and it was delicious!  This cake seriously lasted one day in our house.  I kept having to swat J away from the kitchen.  Enjoy!


Monday, April 1, 2013

Happy Birthday, Monkey!

     Okay so I'm a slacker.  I was supposed to post this on Monkey's birthday, but then my computer died.  Thankfully my awesome brother-in-law is a computer genius, and he revived my sweet Mac.  He also changed my hard drive icon to a zombie in honor of it's reanimation.  Last Monday was my daughter's 4th birthday, and I am amazed at how quickly the time is flying by.  She will be starting school in a little over a year, and I don't know what I'm going to do with myself.  I get teary eyed at the thought of her in a cute little school uniform with her backpack on her back.  I'm probably going to be one of those moms who cries the first day of school.  Scratch that "probably", I cried just this weekend at the sight of her wearing a bit of eyeshadow for the first time.  My husband thinks it's funny to bring up all the ways she'll grow in the coming years, just to see if he can get me to go all weepy again.  Jerk!

     Thankfully, she's not too big for themed parties yet, because I get a kick out of planning them for her.  Last Saturday we celebrated her birthday with a Princess Party, and she had a blast.  Of course I want to share some of the goodies.  First, the invites.  I had my awesome sister take a few shots of Monkey at the local park back home, and then I used Shutterfly to upload them and turn them into cute invitations. I can't figure out how to load the link to the finished project, but here's the picture she took.

Getting ready for the party

     I also had fun thinking of princess-themed snacks this year, and of course Pinterest helped a ton.  First and foremost, there's the cake:


     It may not be professional-looking, but I'm proud of it.  I found a cool tutorial on how to use a coloring sheet to create a chocolate mold of whatever image you want, and I used it to make each of the princesses you see on the top of the cake.  Monkey enjoyed eating the rejects.


Next I made Snow White's Caramel Apples, and although they tasted great they were not photogenic.  They were simple and yummy, though, so here's what you'll need:

1 (14 oz) package caramel
2 TBS milk
Granny Smith apples, sliced in half and cored

Pour caramel and milk into a medium sized bowl, melt in the microwave for 1 minute.  Stir.  Microwave for another minute.  Stir and pour into cored apples.  Let set, then slice and serve.

     Next, representing my favorite princess, I made Belle's Roses:


You'll need:
strawberries
White chocolate
pink food coloring
red icing
kabob or lollipop sticks

Wash strawberries, and skewer them onto the kabob/lollipop sticks.  Melt the white chocolate in the microwave according to package directions, add a few drops of pink food coloring.  Dip strawberries into chocolate, covering up to the white portion, and let set.  Once the chocolate is set, using the red icing, draw outlines of the roses onto the layer of chocolate.  Let set then serve.

   Representing Cinderella, we had Fairy Godmother's Magic Wands:
You'll need:
White chocolate
Pretzel rods
Sprinkles

Melt white chocolate in microwave according to package directions.  Dip pretzels in chocolate.  Decorate with sprinkles and let dry.

   We even had an assortment of sugar cookies shaped into Enchanted Castles, Tiaras, and Cinderella's Glass Slippers.  These were topped with an almond powdered sugar icing dyed the various pastel colors.


For drink, we enjoyed refreshing Princess Punch and my homemade sweet tea:


For the punch you'll need:
2 qrts pink lemonade
2 qrts rasberry sherbet
2 L lemon-lime soda

Add all ingredients to bowl and serve.

For the Sweet Tea:
   Clip 3 large Community tea bags (or 6 small bags) to the side of a gallon-sized pitcher.  Boil water and add to the pitcher until the pitcher is nearly full.  Let it steep for about an hour.  Remove and discard bags.  Add 3 cups of sugar.  Stir and enjoy :-)

Even our chips and dip and various trays had a nod to a certain princess movie.
"Chip"s and Dip

"Tiana's Tempting Trays"

Ariel's "Dinglehoppers"

     All-in-all it was a very good party, and of course Monkey racked up on gifts.


     I'm thinking I'll be going through her toy box and purging next time she's not looking.  Now it's time to go clean out my Birthday Party board on Pinterest until Monkey picks the theme for next year.

*Thank you to my awesome sister for taking the pictures and helping set everything up for the party!*

Friday, September 7, 2012

My Brain's Going to Explode

     I'm sitting outside my next class, shooting the breeze with a fellow student while surfing the internet, and doing just about everything to ignore the fact that I have three major tests next week.  Don't get me wrong, I've been studying.  I'm just to the point where I feel like anything more than an hour a day and my head will explode.  I'm also sleepy, and hungry, and surrounded by distractions and otherwise not inclined to crack open any more books.  But, hey, it's Friday!       Since it's Friday, I feel like sharing something fun with y'all.  Warning: this stuff is dangerous, because it's that good.  Here it is, a recipe for Nutella Pound Cake:


1 1/2 cups flour
3/4 teaspoon baking powder 
1/4 teaspoon salt 
1 cup (2 sticks) butter, softened 
1 1/4 cups sugar 
4 large eggs, room temperature 
2 teaspoons vanilla extract
One 13-ounce jar Nutella


Preheat oven to 325 F; lightly grease and flour a 9 x 5 inch loaf pan and set aside.  Mix flour, baking powder and salt together in a bowl and set aside.  In another bowl, beat the butter and sugar at medium-high speed until light and fluffy.  Scrape sides of the bowl, lower speed to medium and add in the eggs and vanilla until fully incorporated.  In 3 batches, add in the flour mixture, mixing at low speed after each addition until just blended.  Spread 1/3 of the batter in the pan, then spread 1/3 of the Nutella on top.  Repeat with another third of the batter and another 1/3 of the Nutella.  Top with the remaining batter and Nutella and lightly swirl the Nutella and batter together with a knife.  Bake until a toothpick inserted in the center comes out clean, about 1 hour 10 minutes.  Allow the cake cool in the pan for 15 minutes.  Remove cake from pan and allow to cool completely on a wire rack for about 2 hours.  Store well wrapped at room temperature.    This stuff it best warm, so stick it in the microwave and enjoy.  The original poster even mentioned serving it with vanilla ice cream.  My advice:  Don't do it!!!  It's soooooo good!


     As you can gather, there is no real point to this blog entry, other than the fact that I wanted to waste some time before class without going over the Pericardial Cavity for the 10,000,000th time.  Thank you, and enjoy the pound cake :-)

Friday, August 17, 2012

Happy Anniversary, Baby!

   Four years ago today I married the man I loved.  Although my love for him then was as fierce as I could manage, it's a mere shadow of what I feel for him today.  After four years of marriage, not only is he the man I love above all others; he's the man I share a life with, a home with, a child with, and a story with.  He's the first one I want to call when I have some funny story to tell.  He's the first one I run to when there's a crisis.  He's the one that can make me smile, make me laugh, and bring me to tears with just a look.  Even when he's far away, he's still the voice in my head encouraging me to be a better me, to go after that goal, and to believe in myself.  I am so grateful for these past four years, and I can't wait to see what the next 50-60 hold.

    In addition to our anniversary today, Monday is J's birthday, so I wanted to make sure I sent off a care package with enough goodies to spoil him for both occasions.  That's why I was so excited when I found Cake in a Jar!


All you need is 4 Pint-sized jars and the cake mix of your choice.  Prepare your cake batter.  Spray the inside of your jars with cooking spray.  Then fill the jars up about 3/4 of the way with the batter.  Place them on a cookie sheet and bake for the time required in your recipe, or until a toothpick inserted into the middle of the cake comes away clean.  (You may have to adjust the time slightly.)  When it's cooked, remove from oven and carefully screw the tops on tightly.  You'll hear them pop as they seal.  Voila!  Cake in a Jar lasts up to 6 months!  I sent 4 jars of red velvet cake to my hubby with a can of store-bought cream cheese icing.  He can either share or hoard them for later :-)

   In his care package I also included a little photo collage Monkey put together:


And I packed a bag of my Homemade Granola in there along with a few essentials such as razors, vitamins, etc.  I haven't heard whether or not he's received it, but considering I sent it at the end of July, here's hoping.

Saturday, July 28, 2012

She's Ready for her Close-up Mr. Demille

     I've pretty much decided that my child is going to be an actress, or a singer, or a dancer, or something that requires everyone to look at her.  She definitely knows how to command the attention of an entire room, for better or worse.  The other day, when my mom and little brother came to visit, we had to go into the Pass and ID place to get my mom's pass for the weekend to drive on base.  We were there for about an hour, waiting in line because everyone decided to go at the same time.  We passed the time pleasantly enough, talking, catching up, and of course, paying extra-special attention to Monkey's endless antics.  There was a good crowd, so it's no surprise that Monkey was in the middle of the room, where they could all see her.  She was dancing and jumping around until that got old.  That's when she started to sing.  Lately she's been making up her own love ballads, which are greatly influenced by all those Disney movies mommy lets her watch.  In the middle of everything, she belts out, "My heart is so full, and I love my Juju, and my Bubba is in my heart, and I will be so sad, because Mommy will be DEAD!!!"

   Yeah, she said that.  My mom (Juju) busted out laughing, and my little brother (Bubba) was torn between laughter and embarrassment.  I, meanwhile, was trying to recover the situation because all the old ladies who had been grinning and encouraging my little girl now looked at me with shock and indignation.  I just gave a weak smile and a shrug and said, "Gotta love those Disney movies".  That relaxed them a little, and I was able to convince my little brother to walk my little performing artist around the garden outside until we were finished.

    I'll be signing my little singer/songwriter up for dance in a few weeks.  Hopefully that will give her the limelight she seems to be craving, while also teaching her new skills and providing a new atmosphere to make friends.  I'm excited, and she is too.  She keeps asking me when we're going to dance class.  I may have created a monster.

    As for me, I've been up to my normal stuff of keeping busy.  I'm excited that July will be over in a few more days, that's one month down :-)

  I'm going to be sharing two recipes with y'all today, as soon as I figure out which ones I want to pick. How about a good ole Coffee Cake to start off with?

I love Coffee Cake for breakfast :-)

Hmmm....I can almost smell it.
 Coffee Cake Recipe

  • 1 cup butter or margarine
  • 1 1/2 cups granulated sugar
  • 8 ounces (1 cup) sour cream or Greek yogurt
  • 2 eggs, beaten
  • 1 teaspoon vanilla extract
  • 2 cups all-purpose flour
  • 1 teaspoon baking powder
  • 1/4 teaspoon salt
  • 1/2 teaspoon baking soda
  • 1 cup finely chopped walnuts or pecans
  • 2 teaspoons sugar
  • 2 tsp brown sugar
  • 1 tablespoon ground cinnamon
Preparation:
In a large mixing bowl, cream butter, sugar, and sour cream; add eggs and vanilla and beat well. Combine dry ingredients in a separate bowl then add to creamed mixture; beat well. Generously grease a 10-inch tube pan. Make topping by combining chopped nuts, sugar, and cinnamon. In bottom of the well-greased tube pan put about one-third of topping mixture; alternate layers of batter and topping, ending with batter. Bake at 350° for 45 minutes.

"C" is for Coffee Cake
  And now, how about a dinner recipe?  I'm thinking this Tuscan Pasta with Tomato-Basil Cream will be the perfect recipe to share.  I didn't realize that I had this pinned about 5 different times on my "Recipes to Try" board, but I did, so I figured it was high time I tried it, and I'm so glad I did!


Tuscan Pasta Recipe


  • (20-oz.) package refrigerated four-cheese ravioli (I used Buitoni)*
  • (16-oz.) jar sun-dried tomato Alfredo sauce (I used Classico)
  • 2 tablespoons white wine 
  • medium-size fresh tomatoes, chopped**
  • 1/2 cup chopped fresh basil
  • 1/3 cup grated Parmesan cheese
  • Garnish: fresh basil strips
  1. 1. Prepare pasta according to package directions.
  2. 2. Meanwhile, pour Alfredo sauce into a medium saucepan. Pour wine into sauce jar; cover tightly, and shake well. Stir wine mixture into saucepan. Stir in chopped tomatoes and 1/2 cup chopped basil, and cook over medium-low heat 5 minutes or until thoroughly heated. Toss with pasta, and top evenly with 1/3 cup grated Parmesan cheese. Garnish, if desired.
  3. *1 (13-oz.) package three-cheese tortellini may be substituted.
  4. **1 (14.5-oz.) can petite diced tomatoes, fully drained, may be substituted.

It didn't last long.
Well I need to go check on my rising star to make sure she's not getting into anything.  Yesterday I caught her wearing my pink high heels from last Homecoming with a purple scarf and a pink tutu while putting on my make up.  I wish I would've had my camera ready.


Tuesday, May 1, 2012

Cake-Induced Insomnia

     Why am I up at 10:30 baking a cake?  Maybe it's because my darling husband is too delusional from his pain meds to be much company, and I needed a distraction. J came home today and told me that he was given an idea of when he may be deploying again.  Of course I can't share details or anything and nothing is ever definite, but just the thought of him leaving again has me wide awake.  When I should have been in bed over an hour ago, I find myself instead separating egg yolks from the whites.  I shouldn't be so anxious, since we've been through this whole charade many times over the past three years of his Navy career, but this time feels like it might be a bit harder than the last few.  The simple truth is that we've been spoiled.  J has been home since August, and that's the longest Monkey and I have been able to claim him since he joined the Navy.  It's been great having him here, but now I don't want to let him go, which makes having him here that much harder.  It's quite the conundrum.

     I guess if I could give anyone advice (including myself) on dealing with deployments, it'd be this:  Stay busy, and take it one day at a time.  I know, not the most original, but it's effective.  The hardest month of the deployment last time was the first month.  I didn't know many people here, and I was petrified of leaving the house.  So, I was bored out of my mind (even with a then two-year-old running around).  That led to too much time wondering about J, and what he was doing, and why he wasn't calling or emailing or writing.  That meant that when he did contact me, I was snippy because here I was waiting on him all day, and he couldn't even find time to write me an email that was at least half as long as the one I sent him!  (Those were not my finest moments, I'll admit.)  Luckily, I finally made a few friends, started venturing out, found a local library where I could volunteer, started going to church, and basically came up with my own little routine that kept me (and Monkey) busy.  I know that I'll find my groove again after J leaves, but that's not what worries me.  What worries me is that time right before and right after he leaves.  Right before I'm in danger of becoming distant, cold and resentful because I want to spend time with him, but I don't want to get too close because I feel I should prepare myself for the time he's gone.  Then when he leaves I get angry with myself for not making the most of every second.  It's a dangerous cycle, but one that I've found isn't too uncommon among my fellow military wives.
   
    I guess what I need to remember (and what many wives need to remember) is that we're not alone.  I've made many great friends that will be going through the same thing, with their husbands in the same place, leaving at the same time, so I have a support group here.  Plus I have big plans to keep me busy when the time comes, and I'm looking forward to those.  I'm just hoping that the time will pass slowly from now until he leaves, and then it can fly right by until he's home again.  Even though we all know that's not how that works.  Ah, well, and girl can dream, right?

    Well since I've forced you to sit through a bit of rambling, I guess I should share that cake recipe with you.  I've mentioned before that I subscribed to Paula Deen's magazine, but to be honest, the last couple of issues have been a bit of a let down.  I didn't see anything worth making from her February issue, and there was very little in this April issue that I wanted to try.  That is, except for this cake:


     I've been wanting to give it a try since I got my magazine in the mail two weeks ago, and let's just say it was worth the wait.

     Now, there are two versions of this cake, and I plan on sharing both recipes.  I made the lighter version, and I'm glad because I may just eat the whole thing myself.  As for the original recipe, I'll probably save that for a night when we have company over.

  Here's the "A-Bit-Lighter Cherries and Berries Cake" recipe (by Paula Deen):

You'll probably want to do the filling first, as it will need to chill for 4 hours or more before use.
(Makes about 1 cup.)
2 cups chopped fresh strawberries
1/2 cup water
1/2 cup sugar
3 TBS cold water
3 TBS cornstarch

In a medium saucepan, combine strawberries, 1/2 cup water, and sugar.  Cook over medium heat, stirring frequently, for 8-10 minutes or until strawberries soften.  In a small bowl, whisk together 3 TBS cold water and cornstarch until smooth.  Add to strawberry mixture and cook, stirring constantly for 3 minutes or until mixture is very thick.  Remove from heat, and let stand for 30 minutes.  Cover and chill for at least 4 hours or up to 2 days before using.

For the cake, you'll need:

14 egg whites, room temperature
1 tsp cream of tartar
1/4 tsp salt
1 3/4 cups confectioners' suger, divided
1 tsp almond extract
1 1/4 cups cake flour (I used all purpose)
1 1/2 (2.6-oz) packages whipped dairy topping+1 1/2 cups cold milk
(I cheated and used Cool Whip)
Strawberry Filling (recipe above)
Fresh berries to garnish

Preheat oven to 350.  Line 3 (9") cake pans with parchment paper circles.  In a large bowl, combine egg whites, cream of tartar, and salt.  Beat at high speed with a mixer until foamy.  With mixer running, gradually add 1 cup of confectioners' sugar, 1 TBS at a time; beat until stiff peaks form.  Add almond extract.  Into a small bowl, sift together cake flour and remaining 3/4 cup confectioners' sugar.  Gently fold into into egg with mixture.  Spoon batter into prepared pans.  Bake for 16-18 minutes or until golden brown.  Invert cake pans onto a cooling rack, and cool cakes in pans for 30 minutes.  Gently run a knife around edges to release sides.  Remove cakes from pans.  In a large bowl, combine whipped dairy topping (3 envelops) and cold milk, and beat at medium-high sped for 5-6 minutes or until stiff peaks form. (Or skip that last step and use Cool Whip ;-) Spread Strawberry Filling over 2 cake layers.  Spread 1 cup whipped dairy topping over Strawberry Filling on bottom cake layer.  Top with second cake layer, Strawberry Filling side up.  Spread 1 cup whipped dairy topping over filling.  Top with remaining cake layer.  Frost top and sides of cake with remaining whipped dairy topping.  Garnish with fresh berries and cherries, if desired.  Store cake, covered, in refrigerator.


Ta-Da!!
Now for the non-healthy version!

Cherries and Berries Cake

This one also has a filling that should be made ahead of time.

Raspberry Filling
(Makes 1 1/2 cups)
2 (6 oz) packages frozen raspberries, thawed
1/4 cup sugar
6 TBS water, divided
1 TBS fresh lemon juice
3 TBS cornstarch

In a medium saucepan, combine raspberries, sugar, 3 TBS water, and lemon juice.  Bring to boil over medium-high heat, stirring occasionally.  Reduce heat, and simmer for 7-8 minutes or until raspberries break down.  In a small bowl, combine remaining 3 TBS water and cornstarch, stirring until smooth.  Add to raspberry mixture, and cook for 1-2 minutes or until mixture is very thick.  Cool for 30 minutes. Cover and chill for at least 4 hours or up to two days.

For the cake you'll need:

1 1/2 cups butter, softened
2 cups sugar
1 TBS vanilla extract
5 large eggs
3 1/2 cups all purpose flour
1 TBS baking powder
1/2 tsp salt
Raspberry Filling (recipe above)
Cream Cheese Frosting (recipe below)

Preheat oven to 350.  Spray 3 (9") round cake pans with nonstick cooking spray.  IN a large bowl, beat butter, sugar and vanilla at medium speed with a mixer until fluffy.  Add eggs, one at a time, beating well after each addition.  In a medium bowl, combine flour, baking powder, and salt.  Gradually add to butter mixture alternately with milk, beginning and ending with flour mixture, beating until just combined after each addition.  Spoon batter into prepared pans.  Bake for 18-22 minutes or until a wooden pick inserted in center comes out clean.  Cool in pans for 10 minutes.  Remove from pans, and cool completely on wire racks.  Spread Raspberry Filling evenly between layers.  Spread Cream Cheese Frosting over top and sides of cake.  Garnish with fresh berries and cherries, if desired.  Store cake, covered, in refrigerator.

Cream Cheese Frosting
(Makes about 5 cups)

1 cup butter, softened
1 (8 oz) package cream cheese, softened
1 TBS vanilla extract
6 cups confectioners's sugar

In a large bowl, beat butter, cream cheese and vanilla at medium speed with a mixer until smooth.  Gradually add confectioners' sugar, beating until combined.


I can't wait to try that second recipe, especially after how much I enjoyed the "lighter" version.  I think this recipe alone made up to the last couple of disappointing magazine issues.  Well I'm out for the night.  I think the cake did that job of distracting me :-)

Disclaimer:  After reading this, J said I made him sound like a druggie and asked that I clarify.  He doesn't partake in recreational drug use; he was merely high on pain meds.

Disclaimer, part II:  J said that the last disclaimer didn't clear anything up.  I swear that man is never happy.  Fine!  J was prescribed muscle relaxers after pulling a muscle in his back.  And he was a total fruit loop for the 12 hours after he took the meds.  I think I may need to borrow a couple of those things.   O.o

Sunday, April 15, 2012

Birthday Bash!

   This year to celebrate our little Monkey turning 3, we decided to have a family party at our home.  When I asked what type of party she wanted, Monkey kept insisting on a Toy Story theme, so that's what we went with.  From the cake to the decor, it was Toy Story all the way, and I want to share all the fun ins and outs with you.

Let's start with the games, shall we?

First we had a Make-Your-Own Potato Head station.  I used adhesive craft foam (found at Michael's) to cut out various bodies, eyes, mouths, noses, ears and hats.  The kids seemed to enjoy this station the best.


Next up was a Paint-Your-Own Snake-in-the-Boot station.  The idea was to decorate these before using them in a Snake-in-my-Boot Toss, but we never got around to that part of it.  But, I only paid a dollar for these snake at the Dollar Tree, so it's all good.


I think my brother-in-law enjoyed this next game the most.  Each kid was given their own Mini-Marshmellow Blaster (found in the dollar section of Michael's), and was instructed to shoot the various villains from the three films.  Monkey ended up going on a rogue shooting spree after she had enough practice on her targets.


"Say hello to my little friend."

Last, but not least, here's an oldie, but a goodie.  Pin the tail on the donkey, but instead of some nameless donkey, it's that lovable horse, Bullseye.  I found the template and instructions for this game here.


 I knew there would only be four kids at the party, which meant I could squeeze more games in.  These were really good for keeping them all entertained, for the most part.  Plus they were fun for me to put together.

Next up: the food!

In addition to the normal spread of fruit & veggie trays, chips and dip, and hot dogs, I found these online and loved them!  They're supposed to look like Jesse's cowgirl hat, although I've been told that they look more like sombreros (Thanks, J!).


And of course, I had to try my hand at cake-decorating.  This was supposed to look like the bed in Andy's room, and considering that I threw it all together the morning of the party, I think it came pretty close to the mark

...unless you compare it with the elaborate sketch I had made before hand.


  To be fair, if I had used fondant it would have looked more like the sketch, but I don't like the taste of fondant so I try to steer clear of it.   Instead, I used a Buttercream icing with a Nutella Buttercream Filling.  Here is the recipe for the filling, or for the icing just omit the Nutella:

1/2 cup butter
1/2 cup solid shortening
1 tsp vanilla
4 cups sifted powdered sugar
2 TBS milk
3/4 cup- 1 1/4 cup Nutella (It varies based on how chocolate-y you want it.)

In large bowl mix butter and shortening.  Add vanilla, combine.  Add sugar, one cup at a time.  Add milk, beat until combined.  Add Nutella.

 Now, on to the decorations!  J and I had fun staying up until midnight the night before putting all this up. (So if it's crooked, blame it on lack of sleep.)

We found the banner and streamers at Part City, but almost everything else came from Wal-Mart.  We even got one of those helium tanks to blow up our own balloons.  Oh, and those stickers of Woody and Buzz are re-stickable (is that a word?), so we just removed them and put them up in Monkey's room after the party.


I also made a Buzz Lightyear box and Etch-a-Sketch out of cardboard for the kids to take pictures in.
To infinity, and beyond!
Monkey was hiding.
My lovely little sister modeling the Etch-a-Sketch for me.
My favorite part of the decorations was actually this small detail in the "Happy Birthday" banner:

Doesn't it look like Rex is threatening you with a knife?  "Give me my presents, and nobody get hurt!" Or maybe it was just my midnight brain playing tricks on me.

Anyway, last but not least I wanted to share Monkey's outfit.  I found it on Etsy, at this cute little shop.  The boots, I found at the Disney outlet store.

Opening her Mrs. Potato Head from my dear friend, Tessua :-)

My pretty little cowgirl.
All-in-all it was a great day.  Monkey racked up on presents, so much so that her daddy and I are contemplating turning our guest room into a second bedroom just for her toys, but that feels a little too Dursley-esque.  I think a good time was had for all, and now I just have to come to terms with the fact that my little Monkey is three!!!

Friday, January 13, 2012

A Nostalgic Bit of Writing

     After my last, rather whiny post I have returned to the sunny side of life.  Not two days after the last post I received a letter from an old friend of mine.  This friend and I were inseparable from fifth grade until she moved away after our Sophomore year in high school.  Even after she moved, we still kept in touch for a little while by writing letters.  As the years past, we mainly "kept in touch" via Facebook.  I use the terms "kept in touch" loosely b/c it's so easy to read a couple of Facebook statues and assume you know what a person has going on in their life.  Unless you actively engage that person in conversations from time to time, it's hard to say you truly know them still.

     It's been good to receive her letters, not just because of the sender, but also it feel right to me to be writing again.  No, I don't mean like what I do here on this blog, I mean the actual act of putting pen to paper is refreshing.  I know that a lot of people don't bother with the actual mail these days, what with the internet and automatic payments and such, but for me the instant gratification of sending and receiving multiple emails in one day can't make up for the loss of that sense of accomplishment that I feel when I take the time to write out each letter of a long, personal letter to a friend.  The anticipation of waiting for that next installment, that next response, is like waiting for the sequel to a really good book.  It's rather nice.  And slightly nostalgic, and let's face it, I'm more than a little susceptible to bouts of nostalgia.

 
    Speaking of nostalgia, I made a simple, well-known, yet slightly over-looked dessert the other night.  I've never made a Pineapple Upside-Down Cake before, and it's been years since I've eaten one, so I don't know what got a hold of me, but I just started gettin' this craving for one.  The recipe I used was from the Betty Crocker website, and it came out very yummy!  J and I wiped out the entire cake in a matter of three days.  It's a good thing I didn't make any of those pesky New Year's Resolutions about losing weight.  ;-)

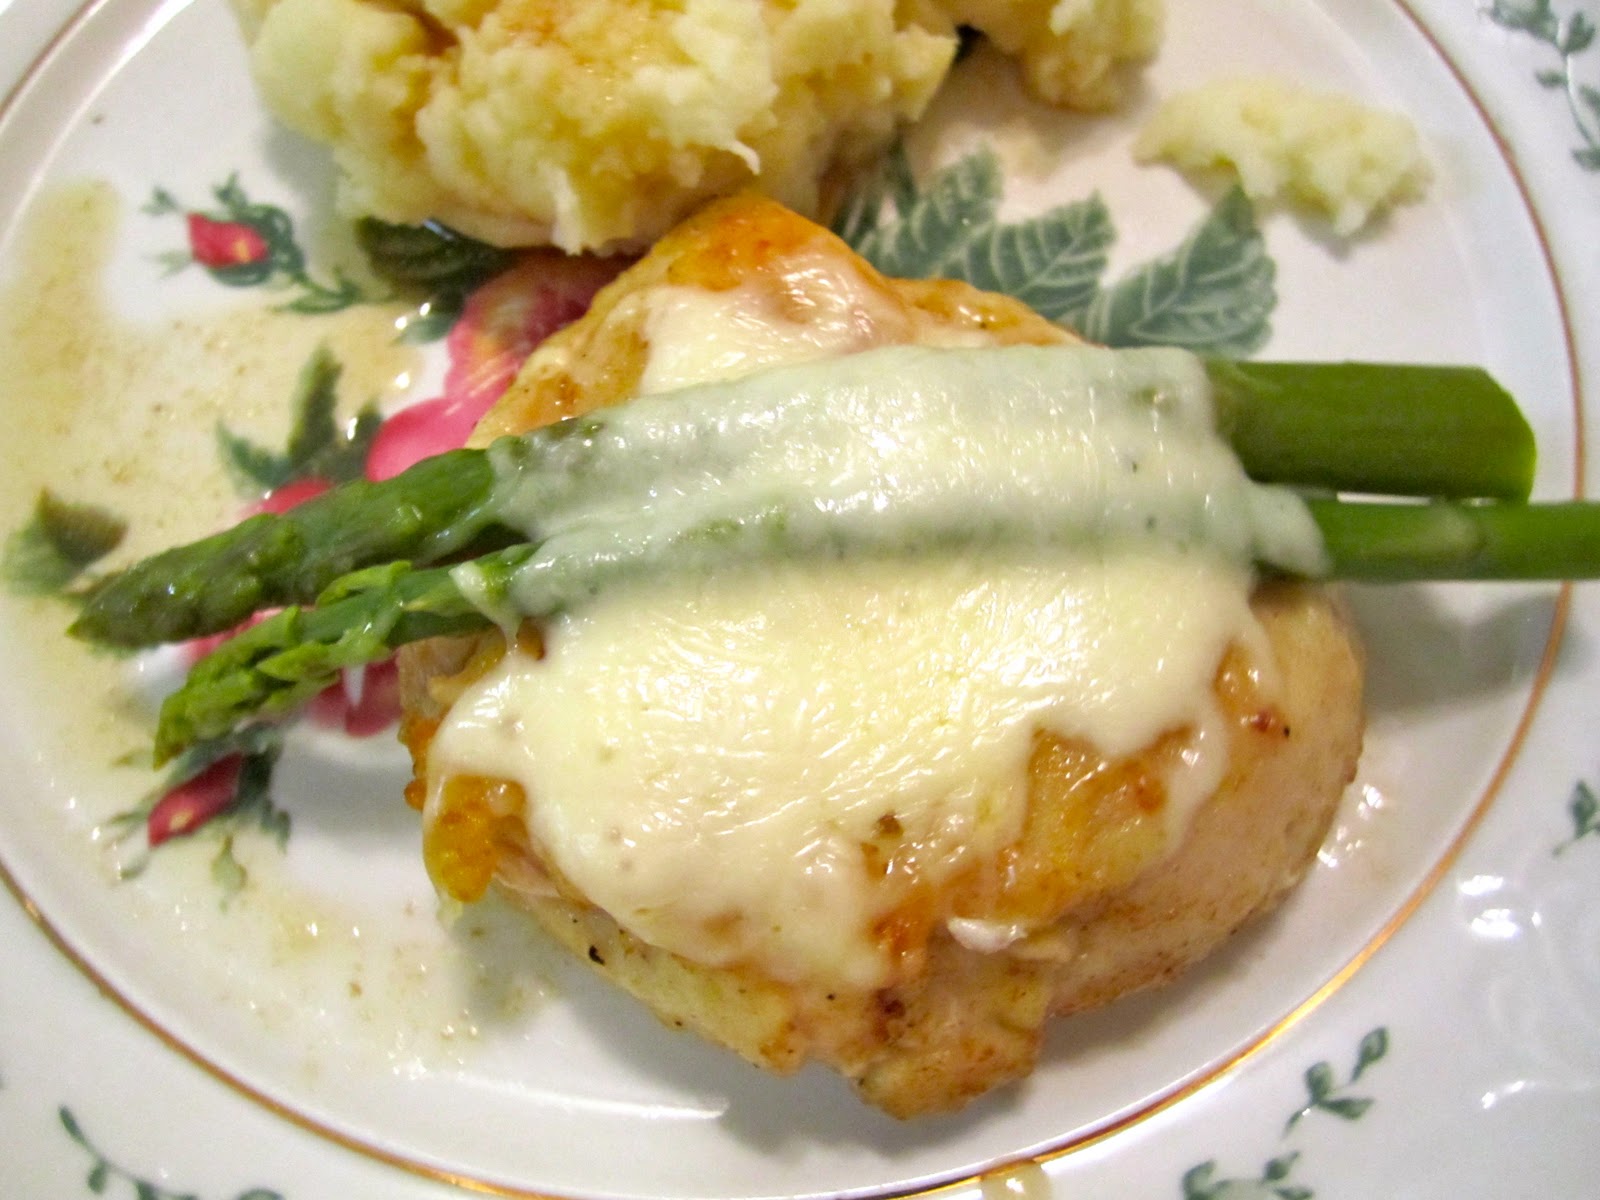
     That night I also made One of my favorite Paula Deen recipes: Quick Chicken Marsala with Asparagus and Mozzarella.  This dish is so simple and yummy, but it tastes like heaven.  I didn't realize that in my quest for sampling new foods J had not gotten the pleasure of this particular entree since he's been home.  That was why I didn't understand why his reaction to his first bite was so intense.  Needless to say, he requested seconds.  :-)

So here's what you need:

1/2 cup of all-purpose flour
1/2 tsp salt
1/2 tsp black pepper
1 3/4 lb chicken cutlets (about 8)
1/4 cup butter, divided
1/2 cup marsala cooking wine
1/2 cup chicken broth
16 asparagus spears, trimmed and blanched
1 cup shredded mozzarella cheese

So here's what you do:

Preheat oven to 350.  Spray a 9x13" baking dish with non-stick spray. (Paula doesn't call for this, but I like to go ahead a beat the chicken breast with a meat mallet, just so they're extra tender.)  In large, shallow dish combine flour, salt, and pepper.  Dredge cutlets in flour mixture to coat, shaking off excess flour.  In large skillet, melt 2 TBS butter over medium-high heat.  Add half of cutlets, and cook 2-3 minutes per side or until golden brown.  Place in prepared baking dish.  Repeat procedure with remaining 2 TBS butter and remaining cutlets.  Add wine to skillet, and cook for 2-3 minutes, scraping the brown bits from the bottom of the skillet with a wooden spoon.  (This is called de-glazing the pan.)  Add broth, and cook for 2 minutes.  Pour mixture over chicken breasts.  Top each evenly with asparagus spears and mozzarella.  Bake for 10 minutes or until cheese is melted.


     Ta-DA!!!  This recipe probably takes about 30 minutes.  I usually do a side of mashed potatoes with it to sop up the juices.  Oh, and for those of you who don't know how to blanch asparagus, I've done the googling for you. :-)  Here are some tips on how to blanch asparagus, as well as a link on how to pick asparagus at the store.

     Well, I'll see you folks again soon.  Now that the hectic holidays have left, and J will be leaving for a couple of months of training I have a feeling I'll be back.  Did you read that in an Arnold Schwarzenegger voice?  'Cause that's how I typed it :-P