Thursday, December 18, 2014

All Things Merry and Bright

     Yesterday was a rough day for me.  My sweet fur baby Bruce has recently gotten over a bout of Pancreatitis which put him through the ringer.  The vet gave him a clean bill of health just two weeks ago, but Tuesday I was back in the vet's office with the same symptoms as before.  Apparently Bruce had Chronic Pancreatitis which meant he would continually get these infections that would require treatment until his pancreas finally wore out.  After seeing what he went through last time with this, and knowing that it would be something he was continually fighting, J and I made the decision to let him go.  It was probably the hardest choice I've ever made.  I want to fix everyone and everything, and so to come to the realization that there was nothing I could do to cure him was one of the hardest pills for me to swallow.  So today with a heavy heart I said goodbye to what was the best cat I've ever had.  He truly was my baby, and I will miss him terribly.  Some people don't believe in a place for animals in Heaven.  Others will tell you they don't have souls.  Everyone is entitled to their opinion, so here's mine: no one who has ever truly bonded with an animal could tell you that they don't have something similar to a soul.  Maybe not a soul like you and I have, but some shred of a spirit perhaps.  There's more to these animals than flesh and bone.  Or maybe we just make them that in our own heads to fill a void.  I don't know, but either way, I hope I get to see him again someday.  It's a nice thought, and a comforting one.

     Now I know the title of this blog is probably leading some to question if they've been brought here under false pretenses, and to those I apologize.  Usually I keep this blog light and fluffy and don't post too many entries that are morose or "deep".  I feel like the world is full of things that should make up stop and think, and that it needs more light and frolicsome things.  So that's what I try to make this blog, for myself as much as for anyone else.  So forgive me if I seem to take a 180 in a minute, but I am going to focus on all things merry and bright now, because as much as I'd like to wail about the loss of my favorite snuggle-buddy, life does go on.  So, not to be disrespectful or flippant about my recent loss, but what don't we move on to the happy things now?  How about I show you what that little elf of ours has been up to?


     Here we see our sweet Elman enjoying his favorite Christmas story while Monkey was at school.  I am particularly proud of this one because I needed no help from Pinterest to make his custom fitting glasses from a little paperclip I found in the junk drawer.  It would have been a bit better if I could have found my stash of regular wire, because it's more pliable, but Monkey got the idea.  I used a bit of black construction paper and some looseleaf to make his book.  I even went so far as to write out a bit of the actual story in the pages so he wasn't staring at a blank book.  


     This one was pretty fun because it uses one of my favorite kid toys.  I'm not sure if you are familiar with Goldie Blox, but if not you should be.  This is an awesome company that was started by a female engineer who wanted to see more toys on the market that got little girls interested in engineering.  I love all that this company stands for, so of course Monkey has a couple of their building sets.  The one seen pictured here is their original boxed set, and as you can see, Elman is taking his cues from Goldie.  He used her "Noodle Spinner" diagram to create his own "Tinsel Tangler".


     Next Elman sampled a few of cookies, only to spit them out and question my husband's baking skills.  Even he knew cookies that gross couldn't have been my doing ;-)


     Here we see Elman visiting Baby Jesus under the tree.  Monkey thought this one was too cute.


     Next, we what I didn't realize was a warped sight until just now.  J took Monkey hunting one morning, so Elman decided he'd go hunting too.  He improvised when he couldn't find a toy gun in Monkey's room and borrowed Iron Patriot's blaster to hunt down this little piggy.  And it looks like all the members of the manager scene are protecting baby Jesus from the horrible sight.  Elman actually gave up the hunt and retreated to a stocking not long after this picture because Bruce decided to make the hunter the hunted and almost made off with our elf.


     This one was a favorite of mine, simply because I hadn't made a single fake snowflake since I was in school, so it was fun to stay up late cutting these suckers out as J and I played cards.  Of course, Elman needed a fabulous addition to his little elf hat.


     Next, Elman helped himself to a spa day by borrowing Barbie's jacuzzi.  Monkey got in a bit of hot water herself when she decided Elman needed real water to soak in, and decided to fill up his jacuzzi with the real stuff.  The funny thing was, I didn't have cotton balls to fill his spa with, so I improvised by using the stuffing from a pad (I know, J was mortified, but hear me out).  I figured it looked the same, and know one had to know, but I'm glad I did, because when Monkey poured the water in there, none of it even made it to the elf.  It was all absorbed so fast he stayed nice and dry.  Score one for mommy's resourcefulness!


     This is another one I'm proud of because I didn't need Pinterest for it....well not 100% of it anyway.  I've seen several shots of the elf in the Rice Krispies box, but I decided to tailor it to what we had in the pantry.  So there, Pinterest, I see your Rice Krispies Elf, and I raise you a Quaker Oats Elf.  Your move Pinterest...

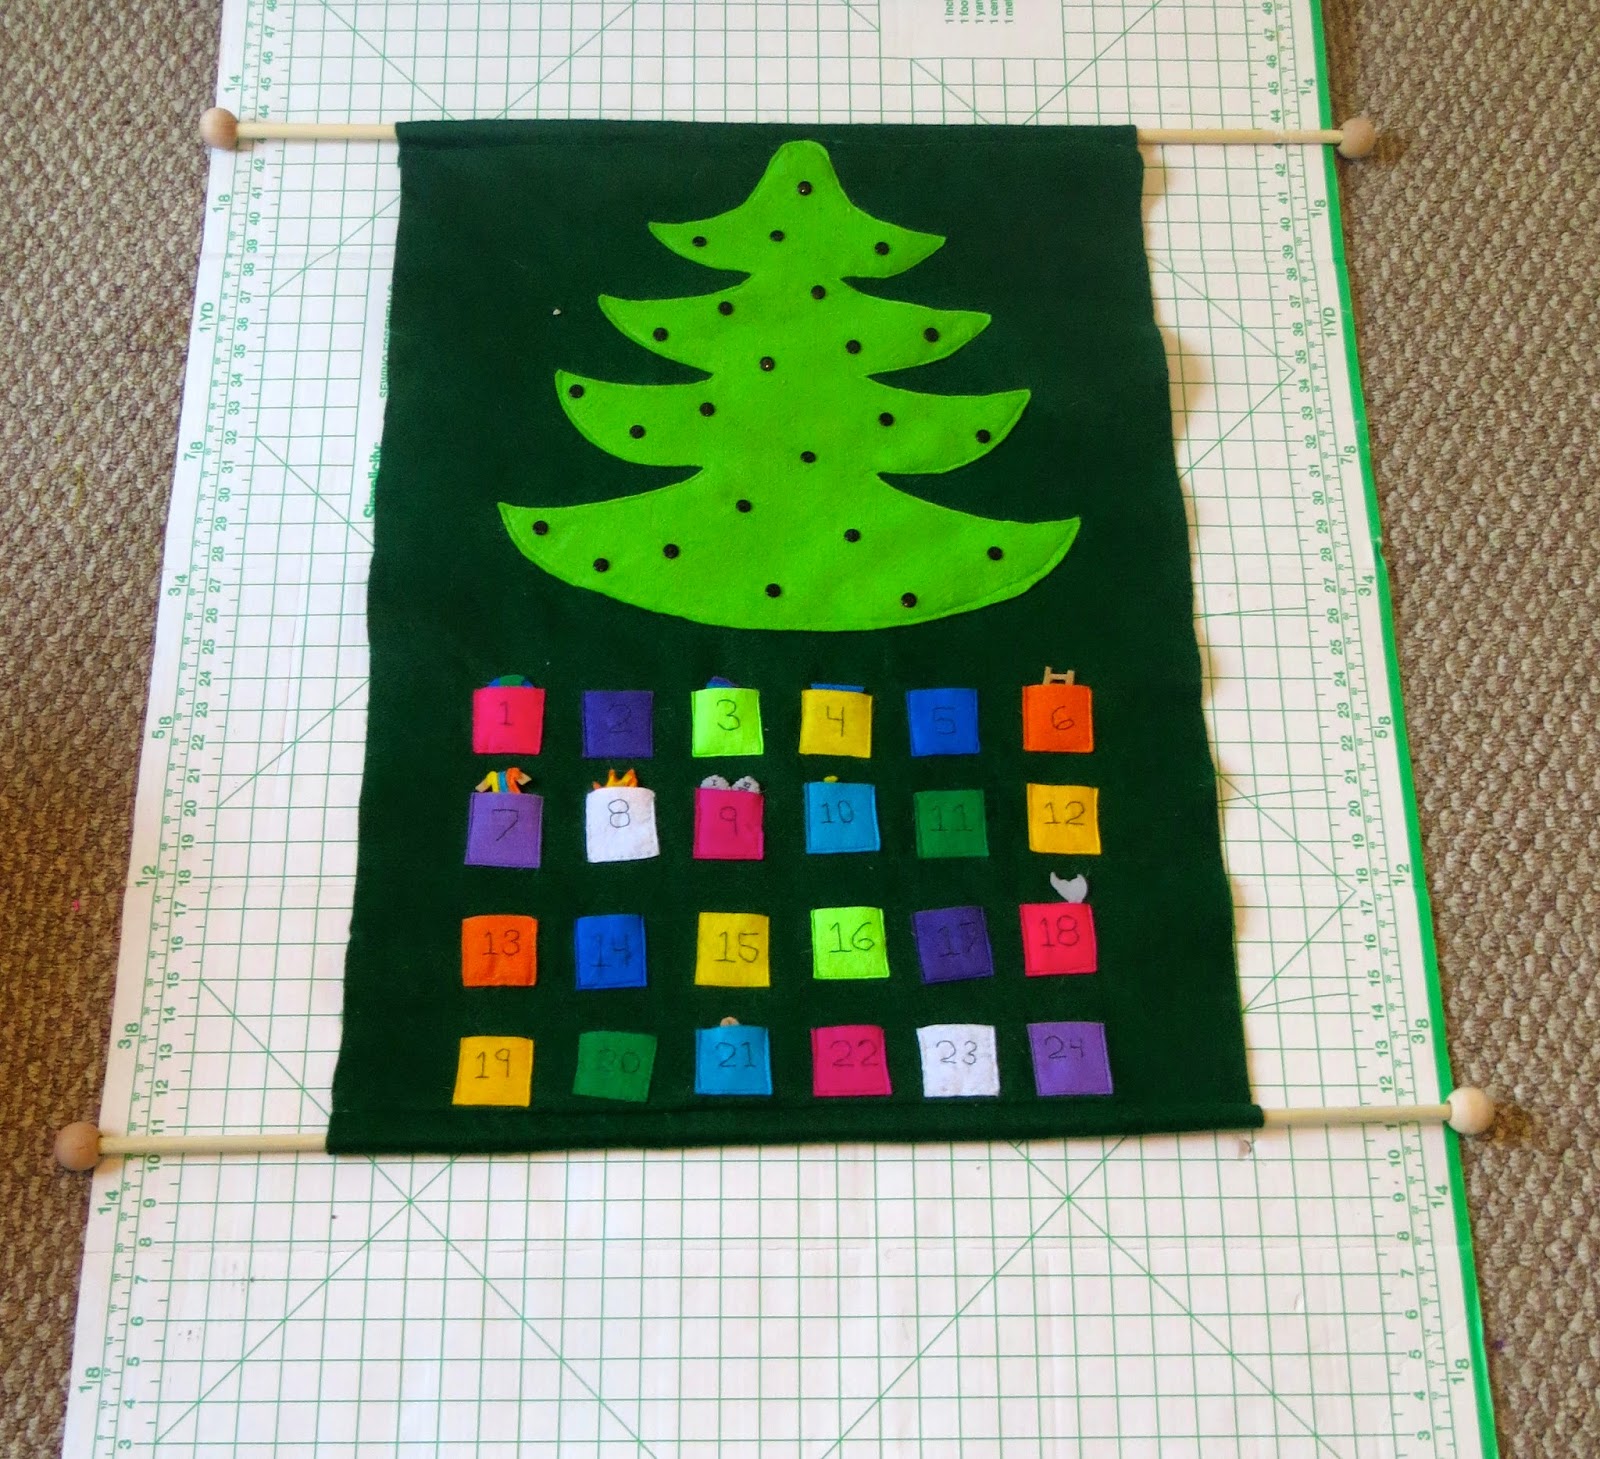
     Now one more thing before I go.  I'm waaay behind on our Advent Calendar, so I need to share the past few ornaments in order to catch up.  I believe we left off with Day 9.

Day 10: The Trumpet


     The trumpet symbolizes the fall of Jericho, and the story can be found in Joshua 6:1-5.  I reminded Monkey of God's promise to Abraham about his children numbering the stars, and how God had seen that one through.  Then I reminded Monkey of His promise to Jacob of the land He would give him.  This is where God fulfilled that promise, by bringing them into the Promised Land, starting with Jericho.  J and I marched around our house to show how the people of God marched around, and how they could have said, "that's silly, I'm not doing that", but instead they decided to follow God's directions, and when they did they were rewarded with the land that had been promised to them.

To make this ornament, I cut out a trumpet from yellow felt and stitched it onto a bit of blue rectangular felt.  Next I used yellow thread to form the little lines that make it look like the trumpet is blasting.  Then I added a bit of blue cord to hang it on the tree with.

Day 11: The Grain

     Next Monkey and I discussed how there was a famine, meaning no food, in the Promised Land so one man moved with his wife and sons to the neighboring land (I related this to how we moved from Lousisiana to Mississippi not too long ago to make it make sense to her), and how while they were there the two sons married women from that country (Moab).  I explained that these women didn't grow up worshiping God, but that they came to know God through their husbands.  Next we talked about how the sons and the father all died, leaving the three women alone.  The mother-in-law told her daughters-in-law to go back to their own families so they might find new husbands, and how one daughter did.  But Ruth was different, she decided to follow her mother-in-law back to the Promised Land, and I mentioned how she wasn't simply choosing her mother-in-law, but that she was choosing to follow God as well.  Because of her faithfulness, God rewarded her.  While in the Promised Land, she worked for a man picking grain so she could feed herself and her mother-in-law.  The man, Boaz, saw how hard she worked, and heard of her faithfulness, and decided to marry her.  I told Monkey that because she chose God, she became special in His eyes, and He rewarded her by making her the ancestor of Jesus (instead of "ancestor" I said "great-great-great-great-great-great-great-great- grandmother of Jesus, so she'd get it).  (For this one, I read the entire book of Ruth and simply condensed it for Monkey.)

For this ornament I took a circle of grey felt and used yellow and black thread to stitch what (I think) looks like heads of grain on the circle.  I backed it with another grey circle and added some cord to hang it.

Day 12: The Crown


     Before I started this story, I asked J and Monkey to help list a few of God's other names.  Monkey said Heavenly Father, Lord, and Majesty.  J said King of Kings, and that's exactly what I was fishing for.  God is the King of Kings, but I mentioned that once the Israelites got the land God had promised, they began to ask Him for a king.  God told them that He was the King of Kings, and that they didn't need an earthly king, but the people insisted they needed a king like the other nations.  God warned them that a human king would tax them and draft their sons into his service, and use their daughters to serve in his court, and he would take away some of their personal freedoms, but still the people insisted, so God told Samuel (God's prophet) to find a king for His people.  Samuel anointed Saul as the king.  I emphasized that Saul was big and strong and handsome, and that all the people thought he would make a good king.  Which he did, for a little while...  (This comes from 1 Samuel 8:4-22-1 Samuel 9:2 and 1 Samuel 9:17)

To make this ornament, I cut a crown shape form yellow felt, and then backed it on a circle-shaped piece of pink felt.  I made little knots out of purple threads to resemble jewels in the crown, and use black thread to highlight the crown's parts.  Finally I added a bit of blue cord to hand it on the tree with.

Day 13: The Horn of Oil

     I explained to Monkey that for a while Saul was a good king, but then he began to turn away from God and not follow God's instructions, so God told Samuel to go anoint a new king.  So Samuel took a horn of oil (here I had to pause and explain that one too), and went out to the house of Jesse (who was a descendent of Ruth, remember Ruth?) and asked to see his sons.  I told her how the first son came in, and he was tall and handsome and strong, and Samuel was impressed, thinking he'd be the next king, but God said no.  God told Samuel that Samuel was judging by what he saw on the outside, but that God sees a man's heart to judge him.  Then the second son came, and he was was too passed by, and so on and so forth until Samuel had looked at all but the youngest of Jesse's sons.  David was out in the fields with the sheep, and so Samuel sent for him, and when he came in, God said that this is the one He wanted to be king of His people.  So Samuel poured the oil on David's head, anointing him king of Israel.  (1 Samuel 16: 1-13)

For this ornament I cut out two pieces of light brown felt into J-shapes.  I stitched them to get using dark brown felt in a way that highlighted the opening of the horn and the bottom of it.  I used the brown thread to also make a strap for the horn of oil.  Next I used a bit of green cord for hanging.

 Day 14: The Jesse Tree

     This one was a little different, because I wasn't sure of where in the sequence to place it, but after talking about Ruth, Jesse, and David, I decided to go ahead and put this one in.  The scripture is from Isaiah 11: 1-5, and I read this one verbatim from the Bible.  It talks about a sprout growing from the tree of Jesse that was all but cut down, and how this sprout would have the spirit of wisdom and understanding, counsel and might, and knowledge and fear/respect of the Lord.  Basically this scripture foretells the coming of Christ.  I explained to Monkey that even hundreds of years before he was born, God was telling His people that there would be a savior one day.

This was one of my favorite ornaments to make.  I cut out two of the stump-with-branch shapes you see, and place them back-to-back, with a bit of green felt to resemble a leaf between the top of the branch.  I stitch the leaf in place before using dark brown thread to make the tree rings and little details on the stump.  Lastly, I added the blue cord for hanging.

Day 15: The Scepter
     
     This story comes from another favorite passage of mine.  I love the book of Esther, and I used a condensed version of the whole thing to explain this one to Monkey.  Basically Esther was a young Jewish girl being brought up by her uncle, and when the king asked for the most beautiful women in the land to be brought to him, Esther was one of them.  She hid the fact that she was one of the Israelites from everyone but her uncle, and she was chosen to be the king's new bride.  She became queen and found favor with the king, so when a plot was hatched to kill all of the Jews in the nation (including her uncle) Esther used her favor with the king to beg him to spare the Jewish, revealing that she was one herself.  The king granted her wish, and so Esther saved her people from being wiped out.  This was yet another example of how God was protecting His people and preserving the bloodline that led to Jesus.

I'm still trying to think of ways to make this one prettier, but I've got nothing.  I simply cut out what I thought was a basic scepter shape from two pieces of yellow felt, and sewed them together back-to-back.  Next I added the little purple starts to look like jewels in the scepter.  Finally I added a bit of green cord for hanging.

To see our Advent adventure from the beginning, click here.
To see what comes next, click here

Sunday, December 7, 2014

Holly Jolly Lunches

     Tomorrow marks the beginning of another week, and as much as I'm looking forward to working with the newborns in the nursery, I'm not ready to let go of the weekend.  There just wasn't enough of it in my opinion.  But in the spirit of the weekday, I thought I'd share a few festive lunches I've been making for Monkey.

Monday:  Olaf Bento

     Monkey loves sushi.  I love making sushi.  Normally, that's a win-win for everyone, but unfortunately, I haven't had time lately to make it.  So when Monkey requested sushi for lunch one day, I decided to compromise.  I made the sushi rice, shaped it into two balls and one egg-shape, and placed it in the bottom of her Bento box.  Next I surrounded the rice with this crab salad I normally stuff in the sushi.  I added a few touches by making Olaf's face, arms, and buttons out of nori.  I topped it all off by giving him a true carrot nose.  A friend of mine asked if I put avocado in my sushi, and I normally do, but I wasn't sure how to keep it nice and green in Monkey's lunchbox, so I decided to leave it out.  If anyone knows a trick, please share.  I finished off the box by packing a few sides like celery, carrots, and tomatoes (not pictured).

Tuesday: Snowman Breakfast Bento


     For this fun-filled breakfast, I used a wooden kabob stick and threaded two boiled eggs onto the stick.  I had two different sized eggs, because my awesome MIL had sent some of her homegrown chicken eggs home with use after we visited for Thanksgiving.  Next I made him a hat out of sliced bits of carrot and stuck those onto the tip of the kabob.  I also stuck a bit of carrot into his face to form the nose.  The face and buttons I made using my favorite food markers.  I added some turkey bacon, pretzels, tomatoes, and strawberry yogurt raisins to the box.


Wednesday: Rudolph the Red-Nosed Sandwich


     For this famous reindeer, I cut circles out of two sliced of bread, filled it with mustard and ham I had also cut into circles, added a mini turkey pepperoni for the nose, half of an olive for the mouth, and bit of the same black olive for the eyes.  I broke up a pretzel to form the antlers.  I serve him up with some extra pretzels, a few cherry tomatoes, and a couple of Halo oranges.

Thursday: Snowmen Sandwiches


     This one was super easy.  I cut four snowmen out of bread using a cookie cutter.  I cut four sliced of ham out with the same cookie cutter.  I assembled the sandwiches using mustard to help them stick.  Next I decorated the snowmen's bodies using my food markers.  I threw some carrots, celery, strawberry yogurt raisins, and a Halo orange into the box too.

Friday:  Santa's Belt Lunchables
This is not my photography (as you can probably tell from their obvious possession of actual photography skills).
     I'll admit that by Friday of last week, I was feeling a bit tired exhausted, so when I realized I had forgotten to buy white cheese, I simply packed Monkey her usual DIY Lunchable.  However, this was such a cute idea, I just had to share.  For the original post, simply click here.

     While we're talking Christmas themed items, I figured it's time I update you on a few more of those lovely ornaments from our Advent calendar.  (If you missed out on the first few ornaments on our calendar, click here.)  We left off on day 5, which was the ram, yes I have since added a photo of the little guy.  Here's the next few:

Day 6: Jacob's Ladder


    For this ornament, I cut out a ladder shape from light brown felt, and I backed it with a bit of white felt to make it less stretchy and floppy.  I added a bit of cord to hang it on the tree and voila!

    This ornament represents the events of Genesis 28:10-22.  I told Monkey about Jacob's dream and how Jacob had a choice of whether or not to follow the God of his father and his father's father or to go his own way.  Jacob chose to follow God, and in turn God promised him the land He had mentioned to Abraham in His promises to Abraham.

Day 7: Joseph's Coat of Many Colors


     For this ornament, I cut the coat-shape from a bit of light brown felt.  I cut a few strips of felt in different colors to make the coat nice and colorful.  Next I added the loop of cord to hang the ornament on the tree.

    This time, Monkey and I talked about Joseph's whole story (she's heard this one many times, and has even watched the movie, so it went pretty quickly).  The main thing we focused on with this story is that God always watches over us and protects us, and how even when it seems we are all alone, God has a plan for us, just as He did for Joseph. See Genesis 37:1-36.

Day 8: The Burning Bush


     For this ornament I cut a squiggly bit of orange felt, topped it with a squiggly bit of yellow felt, and then topped those with a squiggly bit of light brown felt to make a tiny bush that was burning.  Don't forget the cord for hanging.

     Tomorrow when we discuss this one we'll look at Exodus 3:2-22, where God calls Moses to lead His people out of Egypt and into the Promised Land He promised Abraham and Jacob.

Day 9: The Ten Commandments


     This was actually the first ornament I made way back when I started this project.  I used 4 bits of grey felt cut into tombstone shapes.  On two of the pieces that would be the front pieces, I stitched 10 tiny Roman Numerals to represent the 10 commandants.  I sewed the four pieces together, back-to-back, and side-by-side as shown before adding the loop of cord with which to hang them.

     For this ornament, we'll be going to Deuteronomy 5:1-22 to explore the Covenant with Yahweh.  We will talk about how God chose the Israelites to be His own people, set apart from the rest of the world, and since they were to be set apart, they were expected to uphold certain standards for themselves to represent God on earth.

To see the Advent adventure from day 1, click here.
To see what days come next, click here

Friday, December 5, 2014

DIY Advent Calendar

     I have a confession to make.  I'm a bit of a procrastinator.  Well, maybe "a bit" is an understatement.  More like I am a habitual, consistent procrastinator.  In fact, I'm such a bad procrastinator, that this project I'm about to share with you has been about 3 years in the making.  And of course, it's only appropriate that I'm sharing this about 5 days after I intended to....

     Growing up we had an Advent calendar that would come out after Thanksgiving, and my older sister and I would take turns moving a tiny little mouse from pocket to pocket as we counted down the days until Christmas.  That was the extent of our Advent calendar.  It was just a way to keep track of how many days were left until Christmas.  It wasn't until a few years ago that I discovered a Jesse Tree Advent calendar.  I had no clue that you could use an Advent calendar to basically tell the story of the Bible in order to show the events that led up to the birth of Christ and illustrated the world's need for a Savior.  I thought it was a brilliant idea, and I was determined to find a pretty one to purchase for my family and to make it a tradition to tell the story each December.  I found a beautiful tree on Etsy, but was flabbergasted at the cost!  $225 for an Advent calendar?! No way buddy, even though I now understand the effort put into making one, there's just no way.  So instead, I decided to make my own.  'Cause I'm resourceful like that ;-)


      I used felt for all of it, starting with dark green measured 2'x3' for the background and then a light green felt for the tree.  Then I used different bright-colored felt squares for the pockets measuring about 2"x2" each, and I sewed numbers onto each square.  I used plain black buttons on the tree to hang the ornaments.  I hung the whole thing onto two dowel rods with wooden balls I found at Michael's at each end of each dowel rod.  I used yarn attached to the dowel rods to hand it on our door.  Then I started making the ornaments, which was the fun part.  


Day 1: The Earth

     The first day of Christmas' ornament is a little earth.  I cut out two blue circles and made continent shapes out of green felt and sewed those onto the blue circles.  Then I sewed the two circles together back-to-back with a bit of cord between them to hang them on.

     When Monkey hung that ornament on the tree we talked about how God created the Heaven and the Earth and how it was good in the beginning. The story can be found in the Bible in Genesis 1.

Day 2: The Apple

     Next I made a two little apple shapes out of red felt with a stem from brown felt and a leaf from green felt.  I sewed it all together by placing the stem and leaf at the top between the two red pieces and adding a bit of cord to hang the ornament from.

    For this ornament Monkey and I talked about Adam and Eve in the Garden, and about how they lived with God until they sinned against God by disobeying His rule and eating the fruit.  I emphasized that this was when sin entered the world and ruined the perfect plan God had created in the beginning when "it was good".  I also introduced the idea that sin is what separates us from God (Adam and Eve sinned, so they couldn't live in the Garden with God anymore) and that we need a way to get close to God again in spite of our sin.  This sets the stage for Jesus' coming.  For scripture references, go to Genesis 3.

Our resident elf, Elman came to check out our Advent calendar.
 Day 3: The Rainbow


     The next ornament I made was the rainbow.  I layered different sized semicircles in different colors one on top of the other, from purple to blue to green then yellow, orange,and finally red.  I sewed a bit of cord to the back to hang it up on the tree with.

    This day Monkey and I talked about Noah and the Ark (Genesis 6-9:17).  I told Monkey about how after Adam and Eve left the garden the world filled up with people, who eventually were so full of sin, they turned away from God and didn't worship Him or pray to Him like they should.  I told her how God was sad that He had ever created man, and the He wanted to get rid of them, but that He decided to save Noah and his family because they still loved God.  We talked about the ark, the animals, and the flood.  Finally we discussed the rainbow, and how it was God's promise that He would never flood the world like that again.  I told Monkey that this was man's second chance to live without sin, and I asked her if she thought man could, and she said yes, so I said we'd wait until next the next ornament to find out...


Day 4: The Stars


     As we all know, Monkey's prediction of man being able to live without sin after the flood was sadly incorrect, so last night we talked about the call of Abraham (Genesis 17).  Abraham (originally called Abram) was called by God to make a covenant with God, in which God promised to make Abram (which means exalted father) into Abraham (which means father of many) and give him a son and descendants that would "outnumber the stars", as it says in some translations (thus the inspiration for this ornament).  Abraham in return would walk before God as an example of faithfulness to God, and his descendants would be God's people.  His descendants through Sarah his wife would be the Israelites, God's chosen people.  And from them a Savior would be born.

     To make this ornament, I cut two squares of blue felt.  On one of the squares I stitched tiny gold stars using gold thread.  I stitched the two squares together, back-to-back with a bit of cord between them to hang it on our tree.

Day 5: The Ram


     Today's ornament is a ram, which symbolizes God's test of Abraham's faith when He asked Abraham to sacrifice the child that God promised to him and Sarah.  This can be found in Genesis 22:1-14.

   For this ornament I cut the shape of a ram's head out of light brown felt.  I then cut horns out of grey felt.  I sewed the horns to the back of the ram's head.  Then I added the white felt for the mouth and nose section of the ram's fave.  Finally I stitched the eyes, nose, and mouth onto the ram using black thread.

For days 6-9, click here.
For days 10-15, click here.
For days 16-24, click here.

Tuesday, November 25, 2014

It's Ime-tay Oo-tay Eak-Spay Ig-pay Atin-lay

     I'm in trouble.  I discovered that I can no longer get away with spelling things in my house when I don't want Monkey to know what I'm talking about.  I should have seen this coming.  I mean, she's known several small words for a while now, but she has come to that point where she is sounding words out and actively reading, so she's gotten even better at deciphering J's and my secret code.  Sunday we decided we would surprise her by taking her to see Big Hero 6, and when I asked J what time the m-o-v-i-e started, she perked up and said, "I wanna watch a movie!"  I guess it's time to break out the Pig Latin...

     Speaking of Monkey, I know it's only Tuesday, but I have never appreciated Kindergarten so much as I did yesterday afternoon by about 12:30.  I love my daughter, and I have been looking forward to spending extra time with her for weeks, but I forgot how much work it is to keep her busy all day.  I commend all you stay-at-home moms out there.  It's a full time job.  As I mentioned in my last post, we're working on a few projects to learn about properties of water, and yesterday we focused on reversible change, or more simply put, freezing and melting.  After breakfast, I let her watch this episode of Sid the Science Kid while I set up our experimenting station (aka while I cleared off the table).  After the show was over we talked about how water can change to ice and back to water again, and that's why it's called a reversible change.  Then we pulled out our frozen "Sink or Float" experiment, and she recorded her findings.  Next I asked her how she thought she could get her toys out of the ice, and she came up with some excellent ideas ranging from lighting a fire under them, to using the microwave, to sticking the whole thing in the oven to melt the water.  I gently steered her towards using hot water to melt the ice, after all it seemed the safest route.  


     After this experiment she decided clothes were over rated, declared it Pajama Day, and then came back downstairs for more experiments.  I was ready for her.  The night before I had filled three balloons with water.  I made them different sizes, one small, one medium, and one large.  I took them out and instructed Monkey to peel the balloon off and use the frozen balls to create a snowman.  Of course, I had to start singing "Do You Want to Build a Snowman?" while she worked.


     I had Monkey sprinkle a bit of salt between each ball to help them hold together.


     Next, she decorated her snowman using some construction paper cut-outs and salt to help them stick.


     With the snowman finally assembled, I asked Monkey to hypothesize how long she thought it would take our snowman to melt.  She said until the next next, so I had her record her hypothesis of 24 hours and draw the experiment.  I set an alarm to sound every hour so we could record the progress, and every hour Monkey drew a picture of what was going on with our science snowman.  Her hypothesis was incorrect; it only took 7 hours and 26 minutes for our snowman to melt completely.  She recorded these results too before helping me clean him up.

    Now, this experiment was loosely based off of this experiment I found on Pinterest, but I just looked at the picture without reading the instructions (shame on me) so I didn't realize they made two snowmen, putting one outside and one inside to see which would melt faster.  I froze six more water-filled balloons so that we could do that version of the experiment today.  

    I realize that lately most of my blogs focus on kid crafts or kid lunches, and some of you are only here for the recipes (I'm onto you), so it's only fair that I give you what you came for, right?  Well here you go!  This is my favorite hamburger recipe from Paula Deen, and believe or not, no butter was harmed in the making of these burgers. ;-)


Paula Deen's Loaded Juicy Beef Burgers
3 lbs ground beef
1 (8 oz) package baby bella mushrooms, finely chopped
2 TBS prepared horseradish
2 TBS Worcestershire sauce
3/4 tsp salt
1/2 tsp black pepper

In a large bowl, combine all ingredients.  Gently shape into 10 patties.  Spray grill rack with nonstick nonflammable cooking spray.  Preheat grill to medium-high heat (350-400 degrees).  Grill burgers, covered with grill lid, for 5-6 minutes per side or until thermometer inserted into the thickest portion reads 165 degrees.  Serve with homemade buns (recipe to follow), pickles, sliced tomatoes, slice onions, lettuce, ketchup, mustard, mayonnaise, cheddar cheese, or any of your favorite hamburger toppings.


Homemade Hamburger Buns
from Taste of Home
2 TBS active dry yeast
1 cup plus 2 TBS warm water
1/3 cup vegetable oil
1/4 cup sugar
1 egg
1 tsp salt
3 to 3 1/2 cups all-purpose flour

In a large bowl dissolve yeast in water.  Add oil and sugar.  Let stand for 5 minutes.  Add egg, salt and flour to form a soft dough.  Turn out onto a floured surface, and knead until smooth and elastic, about 3-5 minutes.  Do not let rise; immediately divide into 12 pieces (for bigger rolls, divide into fewer pieces).  Shape each piece into a ball.  Place 3 inches apart on a greased baking sheet.  Cover and let rise for 10 minutes.  Bake at 425 for 8-12 minutes or until golden brown.  Remove from oven and cool on wire racks.

Enjoy!

Saturday, November 22, 2014

It's Turkey Time

     I am so happy to say that I am officially on break from school for 10 whole days!  Other than studying for a test we have when we go back, I plan on doing nothing school-related for a week.  That is, until I realize that I'll still have to pass boards before too long, hyperventilate, and start studying extra for the NCLEX.  Until that happens, though, my focus will be on many other things but school.  After today, Monkey will also be on break, so I have been planing a few projects to keep us both busy over the holiday.     We will be learning all about water and it's various properties.  Today we started with a project about why things sink or float.

    I started out by expelling to Monkey that to float means to stay on top of the water, and that to sink means to fall to the bottom of the water.  Then we pulled out a book that's been around since before I was born.  In fact, it was a hand-me-down from when I was a kid.  It's called "Why Does it Float?", and in spite of it's age, it explains displacement and buoyancy in a way that kids can understand.  I found a copy of it on Amazon for only a penny, if anyone is interested.

     Next I had Monkey run around the house to find items she wanted to experiment with.  Then she grouped them into the ones she thought would float versus those she thought would sink.  She got several miniature plastic toys, a leaf, and a cork.

 
    Next, I had her drop each item one-by-one into a bowl of water.  We used a glass bowl so she could see the bottom of the water.


     Next, I had her find differences between the items that floated versus those that sank.  She determined that heavy objects sink, and light object float.  We then tested a few more items, and she had to rethink her hypothesis when a pair of tiny Barbie shoes sank.  That's when we referred back to the book about buoyancy and displacement and determined that the Barbie shoes didn't have enough room in them for air in order to float.

"Weighing" floaters vs sinkers
     Finally, I had her record her findings in a journal.  And as a way to lead into the next set of experiments about freezing and melting, we put our bowl of water into the freezer to see which items will freeze on top, and which will freeze on the bottom.  Monkey also drew her hypothesis for that project.  Tomorrow we'll find out if her hypothesis was correct!

 
     Before she was out of school, I was getting Monkey ready for Thanksgiving by packing her a few festive lunches I'd like to share.  Let's start simple, shall we?


Turkey Sandwich...Literally


     This little guy was super easy to throw together.  He's a turkey sandwich that I cut into a circle.  For feathers I used pretzel sticks and bits of sliced carrots.  I cute out a little bowling-pinned-shaped body for the turkey, and I made a face using my food markers.

Turkey Taco
      This was another simple creation using a tortilla filled with turkey, lettuce, and cheese.  I folded it in half, quesidilla-style, and I drew a turkey using my food markers again.  I added some sides, including yogurt raisins, broccoli, and a "pumpkin" made from a bit of celery and a Halo orange.

Egg-cellent Pilgrims and Indians
      These little guys took a bit more work, but they were fun.  I started with two boiled eggs, cut in half.  I sprinkled a bit of paprika on two of the eggs (these would be my "indians").  Next, using sheets of Nori, I cut out the shape of eyes, noses, and mouths, and arranged them on the yolks.  Then I cut out the hats for the pilgrims, and the headbands for the indians.  Finally I added a "feather" for each indian's headband using a bit of celery leaf.  Then I cut the buckle of the pilgrims' hats out of ham.

Turkey Lunchables


     I decided to spruce up our usual DIY lunchables by making the crackers into a tiny turkey.  I cut out another body from ham, and this time I cut eyes, a beak, and a waddle from a sheet of Nori.  I then arrange some cut up carrots to resemble feathers.  I put the extra ham, cheese and crackers in another container for Monkey to assemble her own.

     Needless to say, I've had a lot of time getting ready for the week off, and I'm looking forward to all the fun I have planned for Monkey, J, and I.  Of course, I'm also looking forward to the whole no school thing.  Needless to say, I'm thankful it's turkey time :-)

Thursday, November 6, 2014

The Best Ruined Soup Ever

     I love this time of year!  It's starting to get chilly here in the South, and it puts me in the mood for warm soups, gumbo, freshly baked bread, and savory desserts!  C'mon, y'all have known me too long to be surprised by the fact that I ended that sentence with food.  Which brings me to the reason I'm writing tonight.  It was chilly earlier this week, so I decided it would be a nice change of pace to make some grilled cheeses with some tomato soup.  I started following this one recipe before realizing that it was not the same one I had used to make my grocery list.  I quickly switched over to following this recipe, convinced that I had ruined the whole thing, but too stubborn (and cheap) to throw the concoction out.  I'm glad I didn't, though, because what resulted was what J deemed, "the best tomato soup I've ever had!"


Ruined Tomato Soup
1/2 onion
1 medium-sized carrot, peeled
1 celery stalk, end trimmed, but leaves still attached
1 garlic clove, peeled
2 cans diced tomatoes
46 ounces tomato juice
3-6 tablespoons sugar
3 chicken bouillon cubes
black pepper
1 1/2 cups heavy cream
1/4 cup chopped fresh basil
1/4 cup chopped fresh parsley
shredded Mozzarella, optional 

In a blender, combine onion, carrot, celery, and garlic.  Puree until smooth.  Add diced tomatoes.  Pour contents of blender into a large pot over medium heat.  Add tomato juice.  Next add the sugar.  (This is to contrast the acidity of the tomatoes, start with 3 tablespoons and taste your way to the right amount.  I wound up needing 5 tablespoons, but it just depends on your tomatoes.)  Add chicken bouillon.  Sprinkle with black pepper to taste.  Stir to combine and bring to a boil.  Remove from heat and add heavy cream, stirring to combine.  Add basil and parsley and stir.  Top with mozzarella if desired.

     As I said, this was the best soup I had ever tasted!  J polished off three bowls of it, and I enjoyed dunking my grilled cheese in it like I was a kid again.  The only one not too impressed was Monkey, but that's okay.  I had plenty soup left over to freeze and some for lunch the next day.  J downed another bowl that day before heading back to work.  That's when I decided it might be a good time to clean out the refrigerator.  As I was getting rid of certain items I found an extra bottle of heavy cream in the corner.  I checked the date and was surprised to see that it hadn't expired yet.  In fact it still wouldn't be expired for another month.  With a sick feeling in my stomach, it began to dawn on me that perhaps I should have cleaned the refrigerator out sooner.  I quickly grabbed the bottle of heavy cream from the night before and checked the date only to find that, sure enough, I had mixed up the expired one with the new one.  The cream I used in the soup had expired September 9th.  I was mortified.  I don't know how none of us got sick, especially after I got brave enough to do a sniff-test.  There goes my world's best tomato soup....

     My dear husband wasn't nearly as horrified by this discovery as I was, but maybe that's for the best, considering how much of it he ate.  He just shrugged and said, "Well, it was still delicious!"  

Tuesday, November 4, 2014

Cookies and Cocoa

     Today I am enjoying my first official day off of school in about 3 months.  I just ended another trimester, so that makes 3 down, and 3 more to go.  Monday I start studying Labor and Delivery and Pediatrics, which are the two subjects I've been looking forward to since the beginning.  I'm not sure which field I want to go into, but I know it's going to be one of those two, and that excites me.  In the mean time, however, I've been catching up on a bit of housework.  Yesterday, Monkey brought home a 100 A on her big sight words test that covered all the words they've been learning since the beginning of the year, so we celebrated by turning some of her Halloween candy into yummy cookies.  So here's a recipe that is a classic:


M&M Cookies
1 cup packed brown sugar
1/2 cup white sugar
1 cup shortening
2 eggs
1 1/2 teaspoons vanilla extract
2 1/2 cups All-purpose flour
1 teaspoon baking soda
1 tsp salt
3/4 cups M&Ms, plus extra for topping

Preheat oven to 350.  Line baking sheets with parchment paper, or grease the baking sheets.

In a large bowl, or in the bowl of a KitchenAide mixer, blend both sugars, shortening, eggs, and vanilla until mixture is well blended and fluffy.  Add flour, baking soda, and salt.  Mix until well incorporated.  Add M&Ms, and gently stir.

Gently roll dough into small balls, and press onto the prepared baking sheets.  Add a few M&Ms to the tops of each pressed dough ball.

Bake at 350 9-11 minutes, or until edges are golden and middles are set.

     Now, what goes better with cookies on a chilly November evening than a nice warm mug of hot cocoa?


World's Best Hot Cocoa
1/3 cup unsweetened cocoa powder
3/4 cup white sugar
1 pinch salt
1/3 cup boiling water
3 1/2 cups milk
3/4 teaspoon vanilla extract
1/2 cup half-and-half

Combine cocoa, sugar, and salt in a medium saucepan.  Blend in the boiling water.  Bring the mixture to a boil, stirring continuously.  Once it begins to boil, simmer and stir for 2 minutes.  Don't let it burn.  Stir in milk and hear until hot throughout, but don't bring mixture to another boil.  Remove from heat and add vanilla.  Distribute evenly among 4 mugs.  Add 1/8 cup half-and-half to each mug.  Top with mini marshmallows if desired.  Enjoy!