You know, growing up I was always one of those kids who could be seen on any given day bringing home a critter or two. In second grade when we studied the life-cycle of a chicken egg, I was one of the lucky few whose parents let her take a chicken home. When the resident library cat at school had kittens, my Daddy let me haul one home. So it was no surprise that the day I fell in love with my husband was the day we were driving home from church, and he pulled over on the side of a busy highway to rescue a poor lost dog from almost getting hit. Tonight on the way home from Monkey's dance class, when I saw a stray cat on the side on the road, my heart almost burst when my husband slammed on the breaks so that I could clamber out and check him for a collar.
In any relationship, as time goes by you tend to take things for granted. You say you won't, that it won't happen to you. You'll be immune to such an atrocity because you value your love more, but as time goes by you'll start to forget. It's a sad truth, but the good thing is, if you're lucky, or if you're vigilant, something will come along that will remind you of those things you've forgotten. And if you're wise enough, you'll use those reminders to help you not take those things for granted anymore.
Tuesday, October 29, 2013
31 Crafts of Halloween
Today I want to do something a little different. Instead of a recipe for y'all I have a list of 31 Halloween crafts for your little one. These are all simple to put together, but fun for your little one. So here we go:
1. Make your own skeleton friend. This one was simple. Just go here and download the free template. Print it out; follow the instruction, and voila! You have a tiny skeleton man for your child to play with.


3. Halloween tree! Monkey has a year 'round tree, so we decorated it for Halloween. You could do the same with a tree in your backyard. For hers we used some orange crinkle paper, construction paper bats, and a witch's hat made from construction paper and a paper plate.

4. Circle Pumpkin. Here's another easy one; simply cut out nine strips of orange construction paper and one strip of green. Have your little one form circles with them and tape them in place. Arrange into the shape of a pumpkin, and you're done :-)

5. Footprint ghost. This one's self-explanatory.

6. ^Handprint tree. Create a spooky tree with your little one's hand and black paint. Or for a less creepy look, use brown paint, and add leaves with their little fingerprints.
7. Construction paper spiders. Trace your child's hand on a black piece of construction paper. Cut it out, and have them glue the two hands together as seen below. Add googly eyes and a bit of string.


10. Halloween color-by-letter; simply click on this link, and print out one of their Halloween-themed pictures.

11. Spider webs!
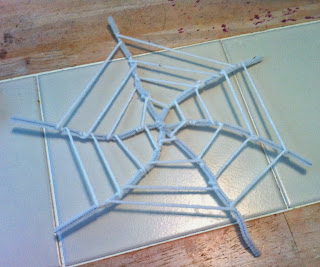
Simply twist three white pipe cleaners together. Tie a bit of string to one of the pipe cleaners, and have your little one attach it to the next pipe cleaner by wrapping it around a few times before attaching it to the next pipe cleaner. Continue until you're back to the knot. Tie off the string.

Go a little higher up, and tie a new know on the piper cleaner. Have your little one continue to attach the string to each pipe cleaner by wrapping it around them as before.


Repeat the process until you're almost to the end of the pipe cleaner. Add a plastic spider to the center if desired and hang it up.

12. Construction paper pumpkins. Cut out three strips of orange construction paper. Tape the first together, forming a circle. With the second strip, form another circle around the first; tape down. Form another circle around the first two; tape down. Cut a small square of brown paper; roll into a cylinder, and tape to the top of your pumpkin. Cut out and attach a little green leaf.

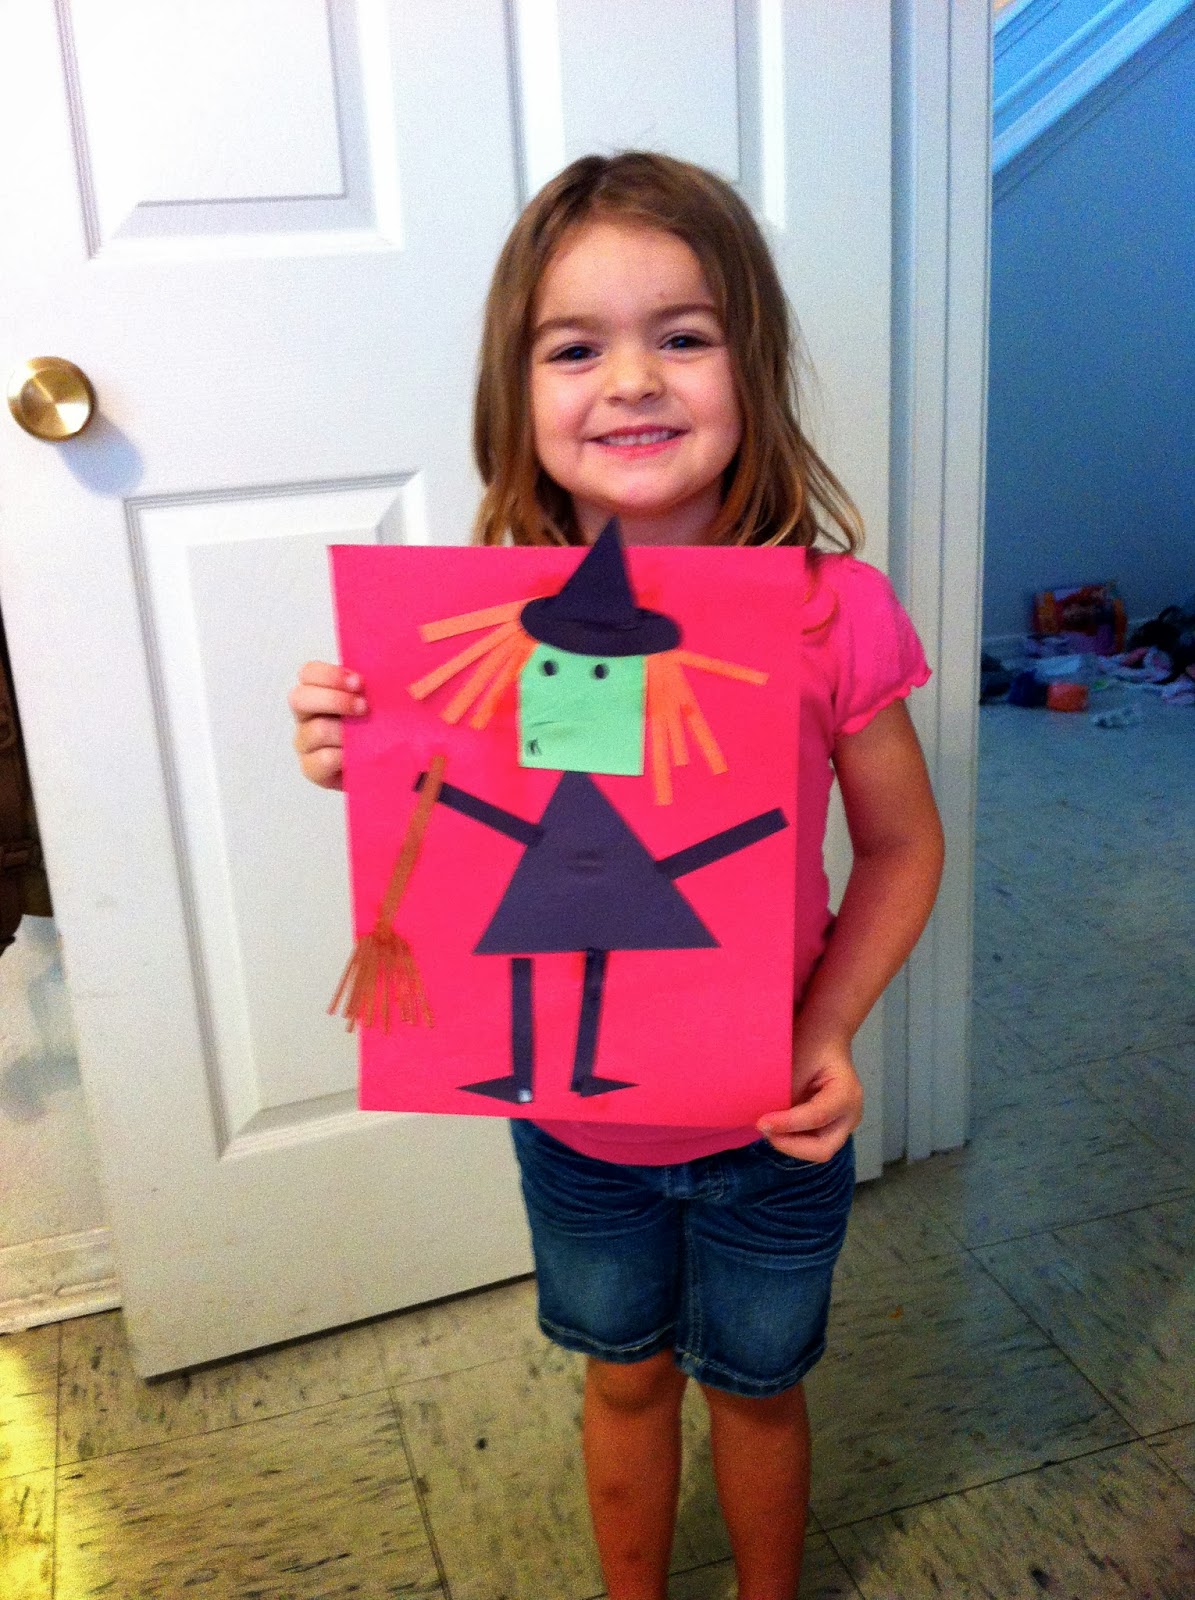
13. Witchy Shapes! This one is great for reviewing shapes with your little one.
Using construction paper cut out the following shapes:
1 green square (for the face)
1 green triangle (for the nose)
2 small black circles (for the eyes)
1 black oval (for the hat brim)
1 big black triangle (for the body)
1 small black triangle (for the hat)
2 extra small black triangles (for the feet)
4 black rectangles (for the arms and legs)
8 orange rectangles (for the hair)
1 long brown rectangle (for the broom)
8 small brown rectangles (for the broom bristles)


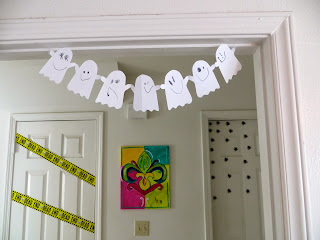
17. Halloween Wreath. Here's another one that's strictly construction paper. Just cut out the different shapes for a pumpkin, Frankenstein, ghost, or other spooky creature, and have your little one assemble their wreath. Monkey had fun making all the different ghost faces.


We go through a serious amount of pasta in my house, so it was easy to find a variety for this particular craft.
21. Tissue Paper Ghosts


Unfold, a form a cylinder. Tape ends together, and have you little one add a face before hanging up.


1. Make your own skeleton friend. This one was simple. Just go here and download the free template. Print it out; follow the instruction, and voila! You have a tiny skeleton man for your child to play with.

2. Cotton ball ghost. This one couldn't be easier. Simply outline the shape of a ghost on some black construction paper with glue, and have your little one place the cotton balls. Add a couple of googly eyes, and there you go.

3. Halloween tree! Monkey has a year 'round tree, so we decorated it for Halloween. You could do the same with a tree in your backyard. For hers we used some orange crinkle paper, construction paper bats, and a witch's hat made from construction paper and a paper plate.

4. Circle Pumpkin. Here's another easy one; simply cut out nine strips of orange construction paper and one strip of green. Have your little one form circles with them and tape them in place. Arrange into the shape of a pumpkin, and you're done :-)

5. Footprint ghost. This one's self-explanatory.

7. Construction paper spiders. Trace your child's hand on a black piece of construction paper. Cut it out, and have them glue the two hands together as seen below. Add googly eyes and a bit of string.

8. ^Toilet paper bat. Paint an empty toilet paper tube black. Add red eyes and white fangs if desired. Cut out wings from black construction paper and attach with tape.
9. Q-tip skeleton. Have your little one assemble a skeleton out of q-tips, glue, and construction paper.


11. Spider webs!

Simply twist three white pipe cleaners together. Tie a bit of string to one of the pipe cleaners, and have your little one attach it to the next pipe cleaner by wrapping it around a few times before attaching it to the next pipe cleaner. Continue until you're back to the knot. Tie off the string.

Go a little higher up, and tie a new know on the piper cleaner. Have your little one continue to attach the string to each pipe cleaner by wrapping it around them as before.


Repeat the process until you're almost to the end of the pipe cleaner. Add a plastic spider to the center if desired and hang it up.

12. Construction paper pumpkins. Cut out three strips of orange construction paper. Tape the first together, forming a circle. With the second strip, form another circle around the first; tape down. Form another circle around the first two; tape down. Cut a small square of brown paper; roll into a cylinder, and tape to the top of your pumpkin. Cut out and attach a little green leaf.

13. Witchy Shapes! This one is great for reviewing shapes with your little one.
Using construction paper cut out the following shapes:
1 green square (for the face)
1 green triangle (for the nose)
2 small black circles (for the eyes)
1 black oval (for the hat brim)
1 big black triangle (for the body)
1 small black triangle (for the hat)
2 extra small black triangles (for the feet)
4 black rectangles (for the arms and legs)
8 orange rectangles (for the hair)
1 long brown rectangle (for the broom)
8 small brown rectangles (for the broom bristles)
14. Connect the Dots Printable.

This website has a bunch of fun Halloween-themed connect the dots to choose from.
15. Witch footprints! Paint all but the heel of your child's foot black. Paint the heel white; have him/her step on a piece of construction paper. Accent with pipe cleaner hair and broom. Add a witch's hat, and voila!
 |
| Sorry, this one's blurry. |
16. Spinning ghosts! This one is really simple, and it's cool to hang up and watch them spin around. Simply trace out a sort of snail-shape on a piece of white construction paper or poster board, like so:

Cut out, and have your little one glue on or draw a face.

Then hang up and watch 'em spin.

17. Halloween Wreath. Here's another one that's strictly construction paper. Just cut out the different shapes for a pumpkin, Frankenstein, ghost, or other spooky creature, and have your little one assemble their wreath. Monkey had fun making all the different ghost faces.

18. "B" is for bat! This one's good for reviewing the letter "b" and for adding another spooky creature to your wall decor.

19. Tired of construction paper? Then here's a link to print out this Jack-o-lantern Scarecrow.

20. Since we're still on a break from construction paper crafts, try this pasta skeleton:


We go through a serious amount of pasta in my house, so it was easy to find a variety for this particular craft.
21. Tissue Paper Ghosts

For one ghost you'll need one piece of cardboard cut into a circle, one clothespin, and one sheet of tissue paper, folded in half, and a piece of white string or yarn. Simply clip the clothespin on the piece of cardboard, wrap the piece of tissue paper around the "head" of the ghost, and tie with a bit of string around the "neck". Monkey gave ours eyes before she'd let me hang them up.
22. Apple Stamped Pumpkins

For this all you're need is half of an apple. Carve out a face, and have your little one use it as a stamp to make pumpkins.
23. Name Skeleton

I've been seeing these floating around Pinterest for a while now, so we had to try one. Simply write out your child's name in a bubbly cursive, and cut out. Cut out a skeleton's head, arms, and legs. Have your child assemble and draw on the face. Monkey insisted that hers needed a bow, since it's a girl skeleton.
24. Paper Jack-o-Lanterns. Yes; we're back to construction paper, but these are a classic. I remember making these in primary school. Simply fold a piece of orange construction paper in half ("hamburger-style, not hot dog" as my teacher used to say), draw lines starting on the folded side going up until it's a couple of inches from the top, and have your little one cut along the lines.

Unfold, a form a cylinder. Tape ends together, and have you little one add a face before hanging up.

25. Halloween Maze Printable

Click here to print out this fun maze, and help Frankenstein's monster find his head.
26. Paper Ghost Chain.

Take a piece of construction paper, and cut it in half lengthwise. Tape those two pieces together so you have one really long strip. accordion fold, and draw a ghost.

Cut out, and voila!

I have many fond memories of my mom making paper doll chains for my sister and I growing up. I thought it was the coolest thing for her to cut out one doll, and then magically pull out this string of dolls. I thought it would be fun to share the magic with my little Monkey. However, she was not quite as impressed when I over-dramatically turned one ghost into many. Her reaction? A quick twitch of her mouth upward before continuing with the coloring I had interrupted. Fine kid! She did enjoy giving them faces, though.

27. Dress Up Yourself! This one had Monkey a lot more excited. I drew out a few sketches of various Halloween costumes.

She colored them, and I cut them out.

We then used a few photos of us for her to "dress up" like paper dolls.

She got a kick out of making her Daddy a mummy, but my favorite was the grumpy witch. It was quite fitting.

If you want to save time, or if you're not as proud of your horrible drawings as I am you could probably find some coloring sheets online and simply replace their face with your child's.
28. "O" is for Owl! I've neer realized how much construction paper we go through in this house.

I'm not 100% sure owls are Halloween-related, but they're nocturnal. And they start with "O". October starts with "O", so there you have it folks, owls are Halloween-related. Mainly because I'm only on number 28 and there's only a few more days until Halloween.
29. Find the Differences Printable
Click here for a printout and let your little one find 7 differences in the picture.
30. Witch's Broom
For this one you'll need an empty paper towel tube (or an empty wrapping paper tube for a life-sized model), brown or black paint, and brown construction paper cut into strips. Have your little one paint the tube and tape or glue the strips to the bottom of the tube. Voila!
31. Paper Plate Skeleton
This crafts requires about 16 plates, white string and a black permanent marker. Cut the paper plate into the various bone shapes; string the pieces together. Add a face, and display your creation proudly :-)

Yay! We made it to 31! Now get to work because there's only 3 days left 'til Halloween ;-)
Bonus: Halloween Nails!

Sorry guys, this one's just for those of y'all with little girls. It was fun giving Monkey and myself a spooky manicure, until she started wiggling, that is.
Wednesday, October 23, 2013
Big Papa's Lasagna
You know how the other day I was talking about how I've been feeling homesick, and I've been cooking wonderfully comforting foods that are horrible for my hips? Yeah, that's still going on. Lucky for you, though, tonight I'll be sharing my wonderfully-comforting-yet-horribly-fattening recipe. Tonight's homesick cure is in honor of my step-daddy. He makes the world's best lasagna! Seriously, it's so good and rich, with chunks of cream cheese sprinkled throughout the layers. Hmmm! Just thinking about it sets my mouth to watering. Tonight I decided to recreate it. So here we go:

 |
| Just look at the ooey, gooey goodness! |
Big Papa's Lasagna
Lasagna noodles (I only used 8 out of the container)
1 tsp olive oil
1 lb ground Italian sausage
1/2 onion, chopped
2 tsp minced garlic
1 jar pasta sauce
1/3 cup water
Seasonings to taste (I used garlic powder, onion powder, Tony's and Italian seasoning)
1 egg
1 (15 oz) container ricotta cheese
1/4 cup Parmesan cheese
1 (8 oz) package shredded Italian cheese blend
3 oz cream cheese, cut into small cubes and divided
Cook pasta according to package directions, adding olive oil to help prevent sticking. Drain and rinse with cold water.
While the pasta is cooking, cook meat, onion, and garlic in a large skillet over med-high heat. Add pasta sauce, water, and seasonings. Stir until blended and warm throughout. Turn off heat and set aside. In a medium bowl, beat egg. Add ricotta cheese, Parmesan cheese, and a handful of the Italian cheese blend to the bowl. Mix well, and set aside.
Heat oven to 375. In a 2-quart baking dish, ladle just enough meat mixture to cover the bottom of the pan.
Add noodles, trimming to fit. (I had to cut 2 in half lengthwise.) Spread 1/3 ricotta mix over the noodles. Top that with 1/3 meat mixture. Sprinkle 1/3 Italian cheese blend over that and 1/2 of cream cheese cubes. Repeat.
Finish off by spreading remaining 1/3 ricotta mix over noodles. Pour remaining 1/3 meat mix over that. Sprinkle with remaining Italian cheese blend. Bake at 375 for 35 minutes, or until all cheese is melted and bubbly.

Thankfully I'm going home tomorrow, albeit for a few hours, but hopefully it will be enough to keep me from indulging in anymore comfort food for a while. I'm working on a half-marathon, but I don't think even my running schedule will be able to keep up if I don't stop with all this food!
Saturday, October 19, 2013
Recipe for Homesickness
It's rainy here in south Mississippi, but I'm not complaining too much because with the rain comes cooler weather. This morning should have found me running the annual Walk/Run to Remember in Baton Rouge, but because of J's work schedule and my looming finals I had to sit it out this year. This is the first year I haven't gone since my family started participating in this 5k. You see, the Walk/Run to Remember benefits the Alzheimer's Services of Baton Rouge, and my family participates in honor of my grandfather who battled the disease for years before he passed away. It was weird not to be there this morning, but that's life I guess.
I don't know what is up with me lately, but I've been having serious flashbacks to childhood. Maybe it's this time of year, but I find myself calling my sister more and more in order to ask her, "Do you remember...?" Maybe I'm getting a little homesick. I haven't been home since July, which I know is a paltry amount of time for most Navy wives, but I live a mere 2 hours from home, so it's odd for me.
I have found a coping method for homesickness, but it's doing my hips and thighs no favors. I've taken to cooking and baking things I haven't had since I was a kid to make up for it. I think I need to find another coping method or just plan a trip home before my pants no longer fit!
At least one of my cooking escapades lately wasn't unhealthy, so that'll be the one I share with y'all. Last night after carving pumpkins, I cooked up a batch of pumpkin seeds just like my mom used to make.

Pumpkin Seeds
Pumpkin Seeds (about 3 cups)
3 cups warm water
1/2 cup + 1 TBS Kosher salt (or any other type)
Remove seeds from carving pumpkins, making sure to get all the strings off. Rinse until clean. Add warm water and 1/2 cup salt to a large bowl; stir until salt is mostly dissolved. Add the pumpkin seeds, cover, and let soak over night. Strain. Spread seeds out on baking sheet in a single layer, sprinkle with 1 TBS salt. Bake at 350 for 20-30 minutes, stirring every 10 minutes, until pumpkins seeds turn white. Remove from oven. Let cool, and store in an air-tight container.
Enjoy :-)
Now I'm off to go cook up a batch of some Chicken and Dumplings. Nothing like a bowl of that to send me right back to childhood. I may even sit Monkey on the counter and let her drop in the dumplings like my mom used to do with me :-)
Tuesday, October 8, 2013
Welcome, Fall!
I've noticed over the past couple of weeks I've had a lot for which I'm so very grateful. I got into the Nursing program at my school. My husband got home early from his training exercise. I got to spend two weeks with my sweet baby girl, and now I find myself sitting next to an open window, enjoying the crisp fall breezes! That's right; we finally got a taste of Fall here in the south, and of course that means it's the perfect running weather. And it's not just because I can now run without feeling like my lungs are caving in; I also no longer have to worry about what types of wildlife I'll run into. Thankfully, since it's been cooler, the most "wild" form of creature I've seen has been a sweet little turtle crossing my path. I love this weather!
Of course this type of weather calls for a certain type of food. The possibilities are endless during sweater weather: warm soups, savory stews, hearty breads, and filling casseroles are just a few that come to mind this time of year. And of course, I have just the thing to share to fit the bill. Here's a recipe for an awesome Shrimp and Rice Casserole from a lovely lady I went to church with as a child:

Shrimp and Rice Casserole
1 stick butter
1 bell pepper
1 stalk celery
1 onion
1 can French onion soup
1 can cream of celery
1 can Rotel
2 lbs shrimp, peeled *Can substitute crawfish*
2 cups rice, uncooked
Finely chop vegetables. Preheat oven to 350. Melt butter in a large pan over medium heat; and in vegetables and sauté. Add the soups and rotel. Mix well. Add uncooked rice and shrimp. Pour into 3 quart casserole dish. Cover with foil, and bake for 1 hour.
This is one of those "throw it in the oven a forget it" recipes so that you have more time to go outside and enjoy this beautiful weather :-)
Subscribe to:
Comments (Atom)