Growing up we had an Advent calendar that would come out after Thanksgiving, and my older sister and I would take turns moving a tiny little mouse from pocket to pocket as we counted down the days until Christmas. That was the extent of our Advent calendar. It was just a way to keep track of how many days were left until Christmas. It wasn't until a few years ago that I discovered a Jesse Tree Advent calendar. I had no clue that you could use an Advent calendar to basically tell the story of the Bible in order to show the events that led up to the birth of Christ and illustrated the world's need for a Savior. I thought it was a brilliant idea, and I was determined to find a pretty one to purchase for my family and to make it a tradition to tell the story each December. I found a beautiful tree on Etsy, but was flabbergasted at the cost! $225 for an Advent calendar?! No way buddy, even though I now understand the effort put into making one, there's just no way. So instead, I decided to make my own. 'Cause I'm resourceful like that ;-)
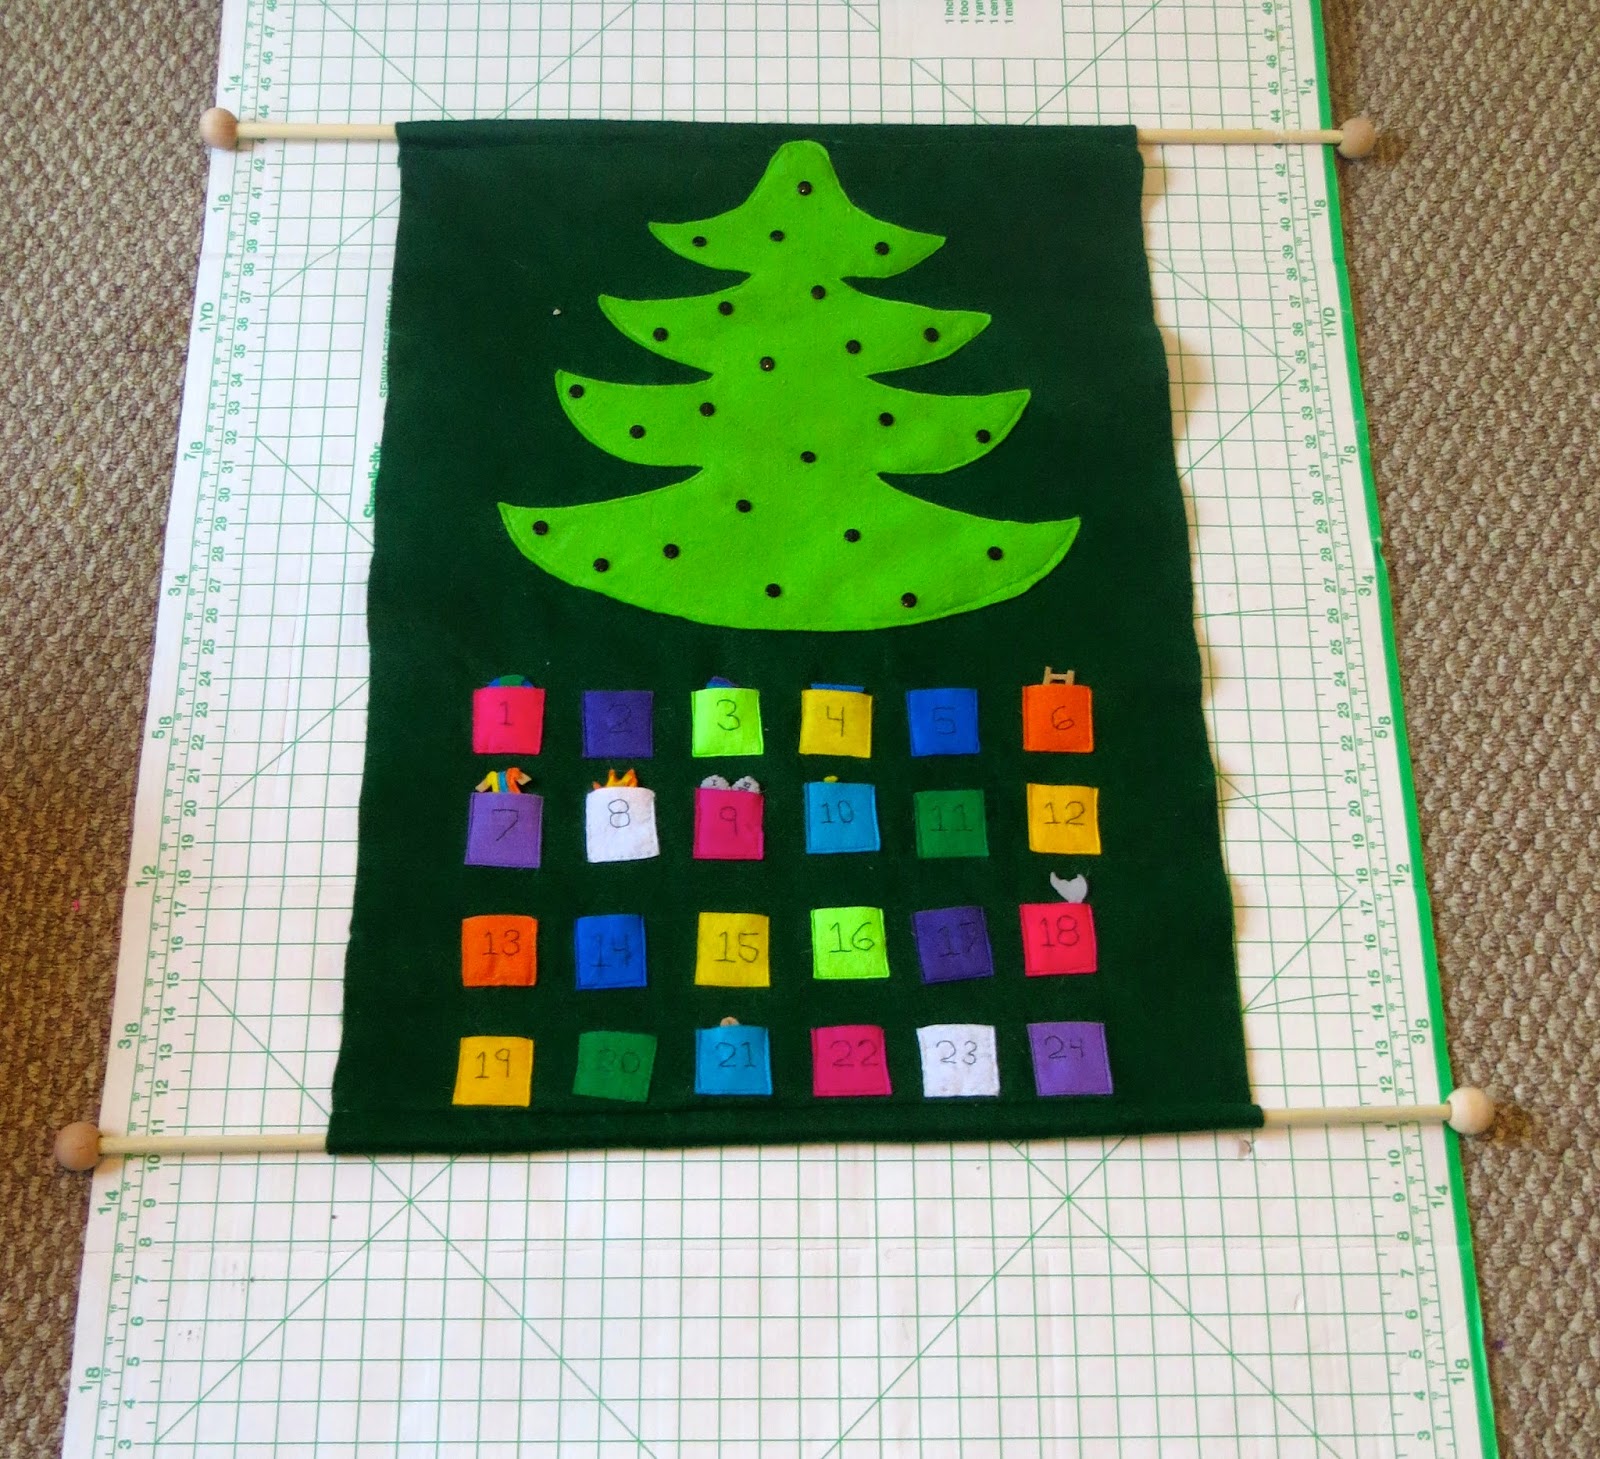
I used felt for all of it, starting with dark green measured 2'x3' for the background and then a light green felt for the tree. Then I used different bright-colored felt squares for the pockets measuring about 2"x2" each, and I sewed numbers onto each square. I used plain black buttons on the tree to hang the ornaments. I hung the whole thing onto two dowel rods with wooden balls I found at Michael's at each end of each dowel rod. I used yarn attached to the dowel rods to hand it on our door. Then I started making the ornaments, which was the fun part.
Day 1: The Earth

The first day of Christmas' ornament is a little earth. I cut out two blue circles and made continent shapes out of green felt and sewed those onto the blue circles. Then I sewed the two circles together back-to-back with a bit of cord between them to hang them on.
When Monkey hung that ornament on the tree we talked about how God created the Heaven and the Earth and how it was good in the beginning. The story can be found in the Bible in Genesis 1.
Day 2: The Apple

Next I made a two little apple shapes out of red felt with a stem from brown felt and a leaf from green felt. I sewed it all together by placing the stem and leaf at the top between the two red pieces and adding a bit of cord to hang the ornament from.
For this ornament Monkey and I talked about Adam and Eve in the Garden, and about how they lived with God until they sinned against God by disobeying His rule and eating the fruit. I emphasized that this was when sin entered the world and ruined the perfect plan God had created in the beginning when "it was good". I also introduced the idea that sin is what separates us from God (Adam and Eve sinned, so they couldn't live in the Garden with God anymore) and that we need a way to get close to God again in spite of our sin. This sets the stage for Jesus' coming. For scripture references, go to Genesis 3.
 |
| Our resident elf, Elman came to check out our Advent calendar. |

The next ornament I made was the rainbow. I layered different sized semicircles in different colors one on top of the other, from purple to blue to green then yellow, orange,and finally red. I sewed a bit of cord to the back to hang it up on the tree with.
This day Monkey and I talked about Noah and the Ark (Genesis 6-9:17). I told Monkey about how after Adam and Eve left the garden the world filled up with people, who eventually were so full of sin, they turned away from God and didn't worship Him or pray to Him like they should. I told her how God was sad that He had ever created man, and the He wanted to get rid of them, but that He decided to save Noah and his family because they still loved God. We talked about the ark, the animals, and the flood. Finally we discussed the rainbow, and how it was God's promise that He would never flood the world like that again. I told Monkey that this was man's second chance to live without sin, and I asked her if she thought man could, and she said yes, so I said we'd wait until next the next ornament to find out...
Day 4: The Stars

As we all know, Monkey's prediction of man being able to live without sin after the flood was sadly incorrect, so last night we talked about the call of Abraham (Genesis 17). Abraham (originally called Abram) was called by God to make a covenant with God, in which God promised to make Abram (which means exalted father) into Abraham (which means father of many) and give him a son and descendants that would "outnumber the stars", as it says in some translations (thus the inspiration for this ornament). Abraham in return would walk before God as an example of faithfulness to God, and his descendants would be God's people. His descendants through Sarah his wife would be the Israelites, God's chosen people. And from them a Savior would be born.
To make this ornament, I cut two squares of blue felt. On one of the squares I stitched tiny gold stars using gold thread. I stitched the two squares together, back-to-back with a bit of cord between them to hang it on our tree.
Day 5: The Ram

For this ornament I cut the shape of a ram's head out of light brown felt. I then cut horns out of grey felt. I sewed the horns to the back of the ram's head. Then I added the white felt for the mouth and nose section of the ram's fave. Finally I stitched the eyes, nose, and mouth onto the ram using black thread.
For days 6-9, click here.
For days 10-15, click here.
For days 16-24, click here.
No comments:
Post a Comment