Thursday, November 21, 2013

10 Thanksgiving Crafts

     Since my 31 Crafts of Halloween did so well, I think I'll make another list of Ten Turkey Day Crafts.

1. Thankful Tree---Using brown constriction paper, cut out the tree.  Cut leaves out in red, orange and yellow.  Tape the tree to your wall, and everyday have your little one write (or say) something they're thankful for on a leaf and tape the leaf to the tree.


     I've seen these on Pinterest a few times, so last year they became a part of our Thanksgiving tradition.  I think it's a great way to make your child consider all that they have to be grateful for, and I think it's fun and sometimes surprising to hear what Monkey comes up with.

2.  Thanksgiving Puzzle--- I did this one with my daughter anther two friends one night last year when I was babysitting, and they seemed to enjoy it.  Click this link to print out the puzzle.  Have your little one color it, and then cut out the puzzle pieces, and have them assemble it.  To make the pieces more sturdy glue them to card stock or construction paper before cutting them out.


3.  Hand Turkey--- Have your child trace his/her hand on brown, red, orange, and yellow construction paper (you'll need 2 hands in each color).  Cut out.  Trace and cut out a bowling-pin shape from brown construction paper for the turkey's body.  Have your little one glue the brown hands to the front of the turkey, and the red, orange, and yellow hands to the back of the turkey to make feathers.  Create a face using googly eyes, orange constructions paper for the beak, and red construction paper for the gobble.  Add a couple of orange feet, and voila!


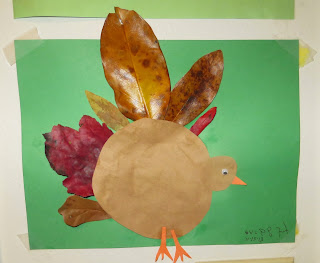
4.  Leaf Turkey---  For this craft, take your little one on a nature hike, and have him/her collect a variety of leaves.  When you get home, cut out one large circle and one small circle from brown construction paper.  Cut out a beak and feet from orange construction paper.  Have your little one assemble the turkey by glueing the leaves to the back of the large brown circle.  Glue the body and feathers onto another sheet of construction paper, and add the small circle for the head.  Add googly eyes (or eye), beak, and feet.


5. Turkey Game---  This fun game can be found here.  It's a free printable, and Monkey loved it. Every number you roll determines which part of the turkey you draw.  The first one to finish his/her turkey wins!


She won!


6. Pinecone Turkey--- This one requires another nature hike to find pinecones (unless you're like me and have many pine trees dropping needles and cones into your back yard).  Once you've found some good ones, bring them home and cut out orange, red, and yellow "feathers" to glue to the back of them.  You'll also need two small orange triangles to form the beak.  Cut out two small circles (in any color) for the eyes.  Have your little ones assemble them with some glue, and you're all set.

I love our slightly drunk-looking turkeys.  Also, they remind me of the penguins on Madagascar.
Tired of turkey?  Well here you go:

7. Scarecrow--- For this one you'll need a paper plate and yellow, red, pink, orange, and blue construction paper.  Cut out two small blue circles for eyes.  Cut out two medium-sized pink circles for cheeks.  Cut out an orange triangle for the nose.  Cut out "straw" from the yellow to go under the hat.  Also trace your child's hand twice onto the yellow, and cut those out for the "straw" under the face.  Cut out a hat from the red.  Help your little one assemble the scarecrow as seen below.  Don't forget to draw the smile.


Since we're taking a turkey break, try out this cutesy craft next:

8.  The Mayflower---  This craft is a good way to start a conversation about the history behind Thanksgiving.  (That's right; it's isn't all about the turkey.)

This one is from two years ago.  Monkey's hands were so small :-(

Have your little one dip their hand in black paint and press it onto a sheet of light blue constructions paper.  Once the handprint dries have them add the little details like the waves and sails.

9.  Pipe-cleaner Turkey---  So, it may not all be about the turkey, but considering that it's a big part of most people's Thanksgiving, here's another cute turkey craft.


If you buy the Natural Fuzzy Sticks craft pack at Wal-Mart, the instructions for this turkey is on the back, but here they are anyway:

You'll need:
3 light brown pipe cleaners
2 dark brown pipe cleaners
2 green pipe cleaners
2-3 red pipe cleaners
2 googly eyes
1 triangle cut out of orange construction paper
Glue and scissors

To form the turkey's body, take one light brown pipe cleaner and tightly coil it so that it forms a large circle.  To form the head, coil another light brown pipe cleaner in the same way.  When you have 1/4 of the pipe cleaner left, wrap it around a portion of the body to form a neck. Glue the googly eyes and triangle to the head.  Cut a small piece off of one of the red pipe cleaners, and attach it to the face, under the triangle beak.  To form the first feather, attach a green pipe cleaner by wrapping one end around the side of the body, form a U with the green before wrapping the second end around the body.  Do the same with the remaining pipe cleaners for form all the feathers.  Cut the remaining dark brown pipe cleaner in quarters.  Attach one quarter to the bottom of the body, and bend part of the end to form one toe.  Repeat  with another quarter to form another foot.  Use the remaining quarters to cut out and attach two more toes on each foot. 

Need something less time consuming? Try this:

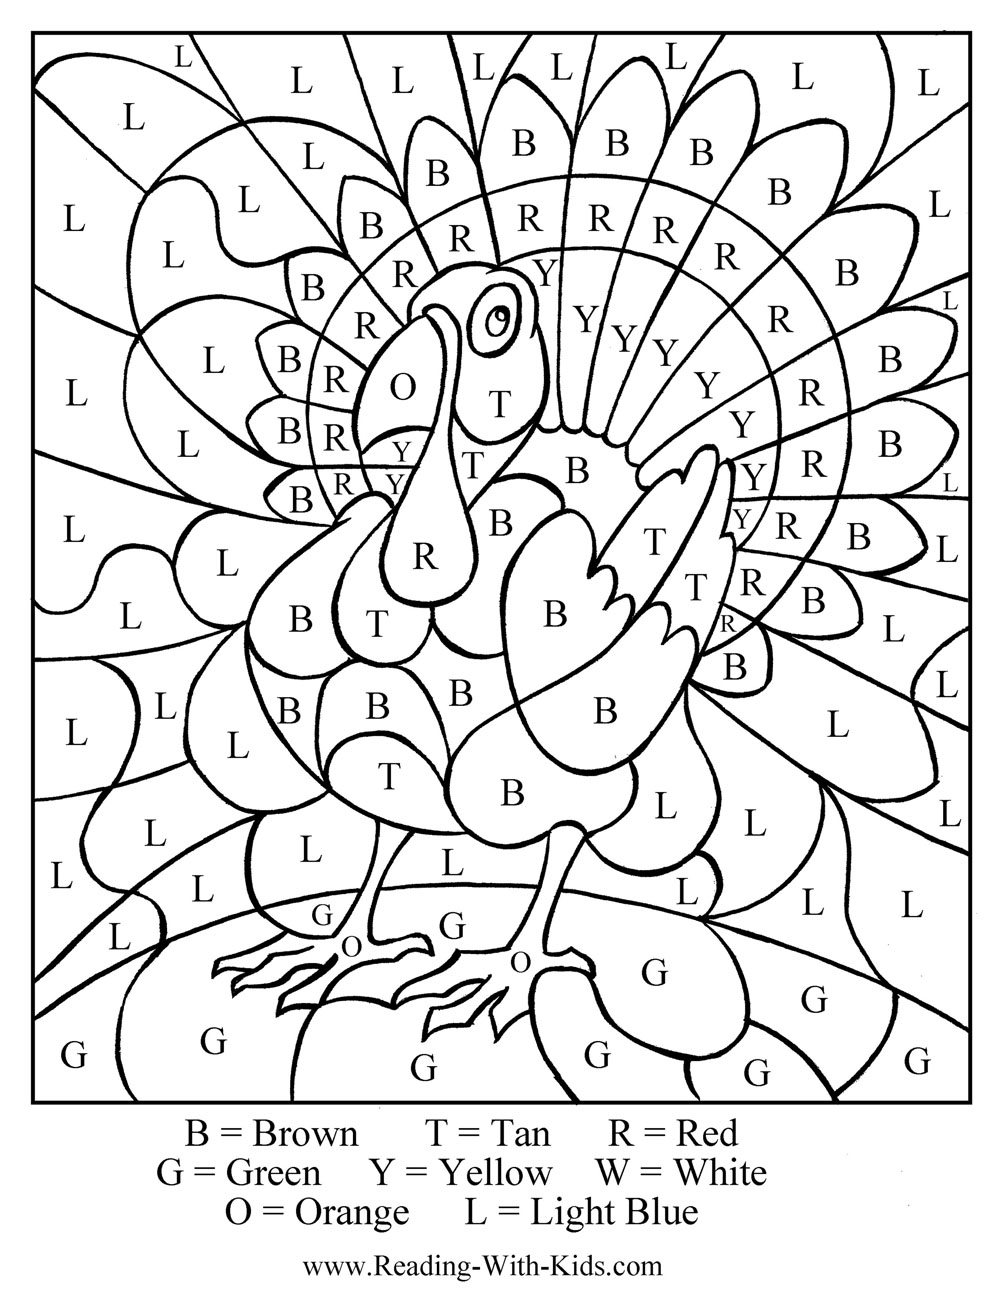
10. Turkey Color-by-letter--- Simply click this link, print out the turkey, and have your little one color it in.  No fuss, no mess, no problem :-)


Sunday, November 17, 2013

It's Good to be Needed

     This past week I started another semester at WCU, but this one is a bit different that any other before.  I'm finally moving into the Nursing program, and we have hit the ground running.  It's an adjustment to say the least, but it's one I'm enjoying.  I've never been one to study much, I was blessed with the ability to excel academically with minimal effort, but it seems those days are behind me.  Every morning I wake up two hours before my family to get in a few chapter's worth of studying.  When Monkey wakes up I fix breakfast for all of us and play catch up on housework.  I spend what time I can with my family before I cook dinner.  After dinner I lock myself back in my study to finish up what I can while J bathes Monkey and gets her ready for bed.  We do bedtime stories as a family and then J and I go to sleep.  It's been a huge reversal from my normal schedule of doing whatever I want with my daughter whenever I wanted.  My time with her is limited lately, and I know once clinicals start that time will shrink again, so I've been stressed out about the idea that she'll learn to do without me or won't want me around as much.  Even when J tried to sooth my fears and explain that they were unwarranted, I still was brought to tears last night when she seemed completely uninterested in my presence at bedtime, but was all about her daddy.  I knew that was a good thing, but I couldn't help but feel replaced.

    Thankfully it didn't take long to be reminded that she still needs me.  In the middle of the night she came into our room, and I thought she must of had an accident, so I started to wake J to take care of it (it was his turn), but then I heard, "Mommy, I had a nightmare", and I knew couldn't pass this off, nor did I want to.  I enjoyed walking her back to her bed, tucking her back in, praying with her for better dreams, and soothing her back to sleep.  It was definitely the reminder I needed to let me know that no matter how much other stuff comes into my life, my daughter is my priority, and even if I'm busier than usual, as long as I make sure to remind her daily of her importance to me, she'll understand why I can't be there 24/7.

  Now you must be wondering why I'm on here if I'm worried that I'm not spending enough time with my baby girl, and the answer is simple: my child would rather watch the Justice League than play with me.  She doesn't mind if I sit next to her, though, so here I am.  And while I'm here I might as well share a recipe, so here you go:


Mediterranean Baked Chicken
from The Clever Carrot

For the marinade you'll need:
1 1/2 lbs boneless, skinless chicken breasts
2 garlic cloves, thinly sliced
2-3 TBS marinade from artichokes
4 springs fresh oregano, leaves stripped

For the bake you'll need:
2 small red onions, thinly sliced
1 pint grape or cherry tomatoes, left whole
1 (14 oz) jar marinated artichoke hearts
1 (14 oz) can northern white beans, drained and rinsed
1/2 Kalamata olives, pitted
1 small tub marinated bocconcini (I just learn these are tiny mozzarella balls, and they're yummy!)
olive oil
salt and pepper
Garnish with fresh basil and parsley to taste

Drain artichoke hearts, reserving its juice in a small bowl.  Pat artichokes dry with a paper towel; set aside.  In another bowl or in a gallon-sized bag, add 2-3 TBS reserved artichoke marinade, oregano, and garlic.  (If you still have extra artichoke juice, save it to drizzle over the dish when finished baking.)  Cut chicken into 1 1/2 inch strips; add to bowl/bag.  Drizzle with olive oil, and mix well to coat.  Marinate 1-3 hours.

Preheat oven to 400.  In a large roasting pan, place onions and tomatoes.  Toss with olive oil, and season with salt and pepper.  Cook, stirring occasionally, until onions are soft and tomatoes begin to burst (about 15-20 minutes).

Meanwhile, in a large skillet warm 1 tsp oil over moderate hear.  Brown the chicken on both sides, working in batches.  The chicken will be slightly undercooked.

Remove roasting pan from oven.  The onions should be soft and sticky.  If not, cook another 5 minutes.  Add chicken, artichoke hearts, beans, and olives to the pan.  Roast 5-7 minutes or until chicken is cooked through.

Meanwhile chop bail and parsley if using.  Remove chicken from oven.  Add bocconcini and herbs; toss gently to combine.  Drizzle with olive oil and extra artichoke juice if desired.

Enjoy!

   This was so good.  It was easy to throw together, but was "fancy" enough for company.

Friday, November 8, 2013

I Can't Come Up with a Witty Title Before I've had my Coffee

     You know what I discovered last night?  My husband is extremely competitive!  I was up all night because he wouldn't let me go to sleep until he had won a round of cards.  I kept winning which meant we kept staying up.  Finally I had to cut him off for my own sanity.  I passed out, exhausted, at 1:00 am only to be awoken at 7:00 by a four-year-old Howler Monkey who was calling to the moon or something.  Today requires coffee.

     Thankfully my competitive J has decided to make it up to me by making breakfast and coffee :-)  I think I'll keep him.  I've been so preoccupied with Christmas projects that I haven't really felt like cooking.  Shocking, I know, but I have some really fun crafts I'm working on right now, which I'll share later.  In the meantime my dinners have been a little more thrown together than usual, but that's okay because I found a new favorite for a quick weeknight meal.  I saw a picture of these on Pinterest, and decided to try it.


Cornbread Waffles

1 box Jiffy cornbread mix (this was just enough for J, Monkey and I; you may need more if you have a bigger family)
2 cans of your preferred chili (or click here for an awesome crockpot recipe)
Toppings such as lettuce, diced tomato, cheese, salsa

Mix Jiffy according to directions on package.  Cook in waffle maker according to instruction that came with your waffle maker.  Meanwhile heat up chili.  When the waffle is cooked, spoon chili on top and add desired toppings.

Enjoy :-)

     This meal literally takes under 10 minutes to make, and J and Monkey love it!  It's perfect so that I can feed my restless natives and still manage to get back to my craft room in record time.

     One of the crafts I'm working on is an Advent calendar.  We had one as a kid, and I remember my sisters and I taking turns each day moving our little mouse into a new pocket until Christmas day.  I've been wanting to make one for Monkey, but I could find a cute enough template.  Last night (in between card games) I started finding ideas for one.  I had never heard of a Jesse tree before, but after seeing this one on another blog, I decided that's what I want to do.  I like the idea of each ornament teaching another part of the Bible that led up to the birth of Christ.  I'm not using her pattern (sorry, $52 dollars for a craft kit? No thanks.), but I do like the idea.  I'll let y'all know how it turns out.  :-)

Sunday, November 3, 2013

Halloween Leftovers

     You know what daylights savings time means to me?  It means I now wake up at 7 instead of 8.  I don't know where people get the idea that we gain another hour, because my internal clock is all, "Nope!  Get up, lazy bones, and be productive this morning."  Unfortunately, she didn't come with a snooze button. Yet somehow my husband manages to snore on next to me, and the sound of morning colors won't rouse Monkey for another 30 minutes.  I should be adding another 1667 words to my story for NaNoWriMo, but I don't wanna.  I made a mistake in my story yesterday, so I have to rewrite part of it, but I don't want to delete anything from my word count :-(  I'll tackle it after my run.  That'll give me time to rewrite it all in my head.

     It's November y'all; do you realize how crazy that is?  This year is almost gone.  I swear ever since I had Monkey time has been moving faster and faster, and this year feels like it's approaching warp speed.  Before I know it, it'll be next August, and Monkey will be starting Kindergarten.  Yikes!  I wouldn't mind skipping ahead to graduation, though.  Mine; not hers, of course.

     I'm rambling, aren't I?  You can thank J for that.  If he would wake up, I'd talk his ear off instead.  Oh well; I do have a recipe to share with y'all, though.  Because Monkey racked up on candy Halloween night, I've bee trying to find recipes to use some of it up.  This website, Something Swanky, has a list of 50 things you can do with leftover Halloween candy.  It's pretty awesome.  Last night I made these:


Brown Butter Milky Way Cookies

1/2 cup (1 stick) unsalted butter
1/4 cup sugar
3/4 cup dark brown sugar (can substitute light brown)
1 large egg
2 teaspoons vanilla
1 cup flour
1 cup + 2 TBS old-fashioned rolled oats
1/4 teaspoon salt
1/2 teaspoon baking powder
1 1/2 cups Milky Ways, chopped and frozen (I used regular and dark chocolate)

Melt butter in a small saucepan over medium heat.  Stir constantly, remove from heat immediately when butter starts to turn brown (about 8 minutes).   Pour into a shallow dish, and chill until it becomes solid, but still soft.  (I popped mine into the freezer for about 15 minutes).

In a large bowl, cream together butter and both sugars.  Add egg and vanilla; mix until combined.  Slowly mix in flour, salt and baking powder.  Stir in oats manually.  Wrap dough in plastic wrap and chill for 30 minutes.

Preheat oven to 375.  Line baking sheets with parchment paper or spray with cooking spray.  Roll dough into 1 1/5 TBS balls.  Press 4 pieces of frozen Milky Way into each ball. Bake 9-10 minutes, until brown on the edges, but still soft in the middle.  Cool for 3 minutes on baking sheet before transferring to a baking rack to cool completely.

Enjoy!